

It’s time for you to brew your own liquid gold, Kombucha!
First, if you’re new to booch, there are a few basics to know:
What exactly is kombucha?
Simply put, kombucha is a slightly alcoholic, fizzy, fermented sweet tea drink often flavored with things like fruits, juices, herbs, or spices.
Why should you drink it?
Not only is it so damn good, it’s also a rewarding, creative process. It’s also great for your health. Kombucha’s probiotic properties can promote gut health through the colonization of beneficial microbes within the intestinal tract. Reports include a whole host of health benefits, from improving digestion, diabetes, and immune system function, to reducing blood pressure, alleviating symptoms associated with rheumatism, gout, hemorrhoids, and even fighting cancer. While there hasn’t been any credible scientific studies done on the health benefits of kombucha, the feeling you likely will get from drinking kombucha consistently is a combination of more energy, mental clarity and overall “lightness”. Our gut microbiota is extremely complicated to study, with our digestive tracts playing host to about 100 trillion bacteria. We may never fully understand the interaction between the bacteria from kombucha and the existing bacterial ecosystems in our bodies, but my philosophy here is simple: listen to your body...and to your gut (literally)! There’s a reason people have been praising it’s healing properties for over 2,000 years!
How is it made?
Find our Recipe below, but generally speaking, you start by boiling water, dissolving sugar, then steeping tea leaves (usually black or green). Once strained and cooled, you’ll begin the first of two phases of fermentation by introducing a SCOBY (symbiotic culture of bacteria and yeast) to the sweetened tea, wherein the yeast and bacteria begin breaking down the sugars into alcohol, and subsequently into compounds like acetic and gluconic acid. The length of this initial aerobic fermentation depends on a few variables, such as temperature or size of your SCOBY, but generally takes about 10-20 days. Phase one is more or less complete once the kombucha satisfies your personal taste preferences (sweetness, acidity, etc.). You can also take a pH test using these pH strips. The perfect pH for second fermentation should you choose to do so, is 3.0. The second stage of fermentation is where flavoring, bottling, and carbonation come into play. Once the kombucha has been flavored to your liking and has been transferred to an air-tight bottle, anaerobic fermentation begins, wherein the residual bacteria and yeast continue digesting sugar molecules, releasing carbon dioxide (CO2) and ethanol as a byproduct. The air-tight bottle traps the resulting CO2, effectively creating the carbonation we associate with kombucha.
Are you a visual learner? Watch this video!
What’s the difference between store-bought and homemade kombucha?
There is something beautifully humbling and wildly empowering about taking ownership of your food supply chain. This same sentiment is one of the many reasons people become so passionate about edible gardening! Making your own kombucha is not only more economically advantageous, but is also more environmentally sustainable through the elimination of single-use packaging.
Another reason to consider making your own is quality. Due to the legal limitations around ABV and other safety concerns, commercially produced kombucha is sometimes pasteurized, meaning it’s heated to certain temperatures in order to kill harmful bacteria and stop/limit the production of ethanol. The problem with pasteurization is that it isn’t selective about which bacteria it kills, so this effectively reduces or eliminates the rest of those beneficial bacteria/probiotics as well. Of course, not all (or even most) go through this process! Pro tip: only buy kombucha that is specifically labeled as “raw.”
There have been other controversies over accurate labeling of sugar content in commercial products. Making your own kombucha allows you to control the sweetness and flavoring.
What’s a SCOBY and where can I get one?
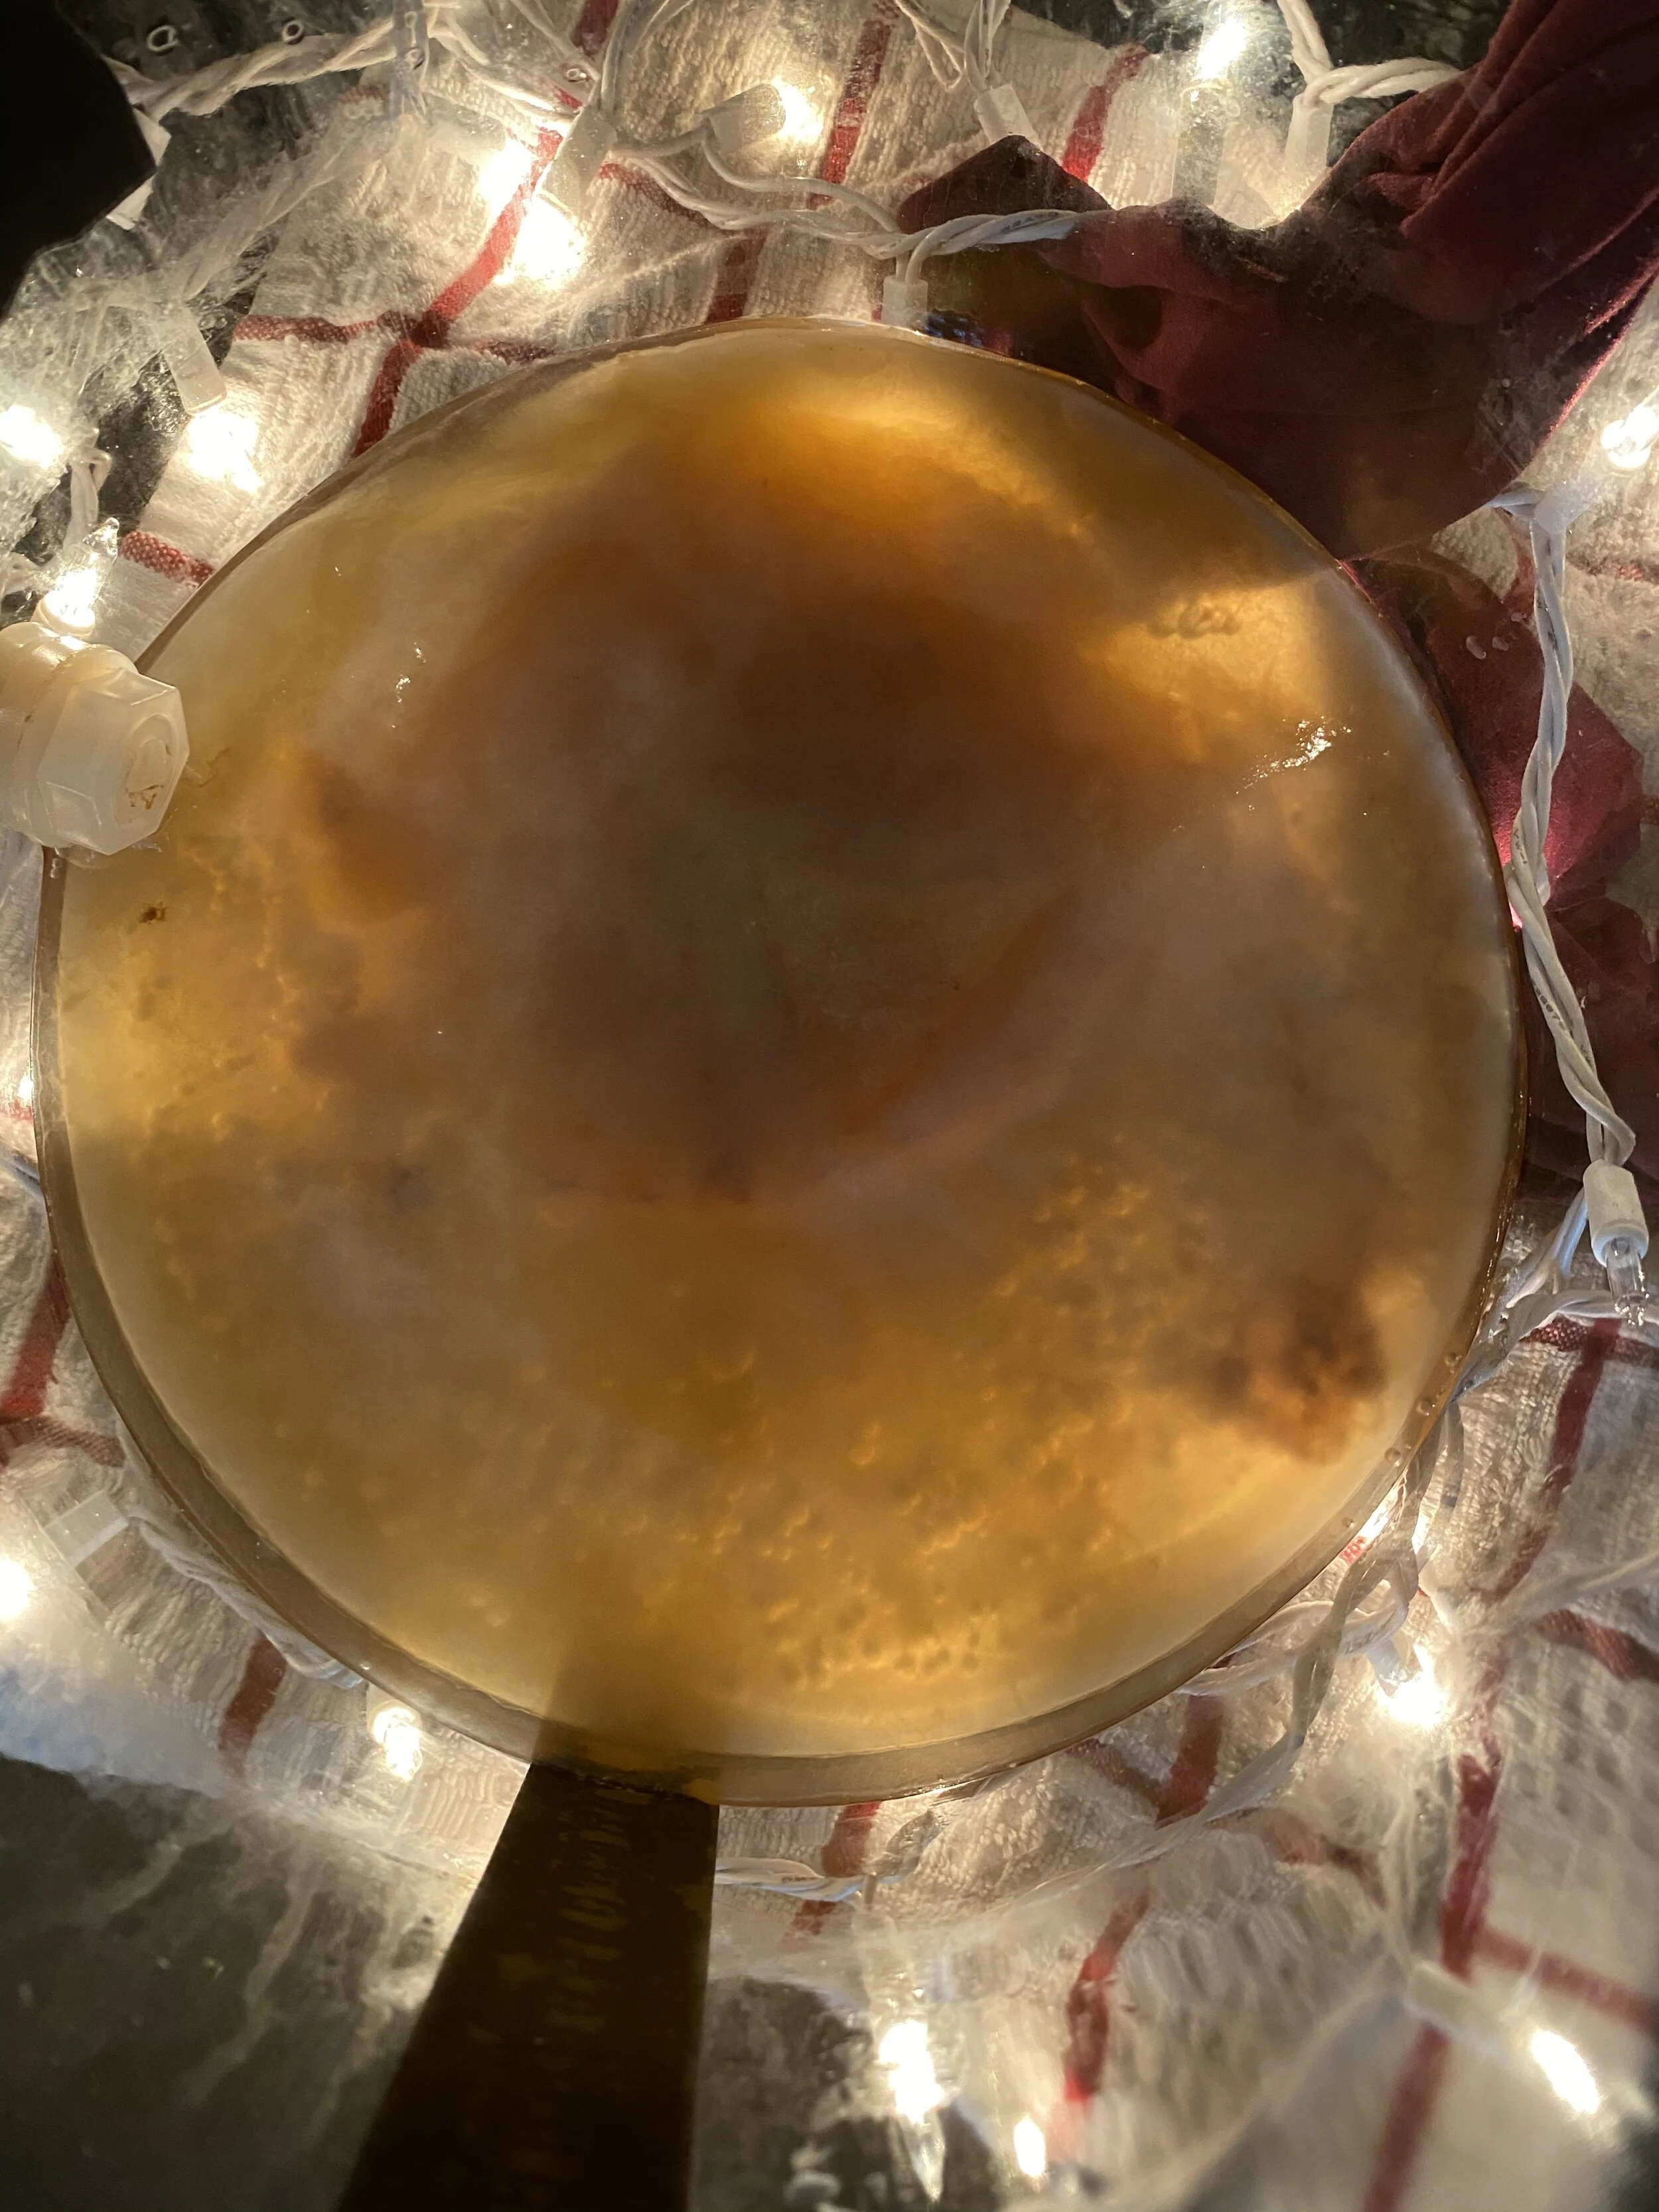
SCOBY is an acronym for “symbiotic culture of bacteria and yeast.” Think of it like a sourdough starter but for kombucha, and much weirder looking. In the context of kombucha, it is a gelatinous cellulose-based biofilm or microbial mat that is added to a tea in order to initiate the fermentation process. While it is possible to grow one yourself, the easier (and arguably safer) route for a novice would be to either acquire one online. Find our favorite source here!

Tips & Troubleshooting: read before brewing!!!
Like all living things, a SCOBY can experience issues. Knowing these issues and how to prevent them will save you time, energy, and money.
Covers explained: while many people choose to use cheesecloth to cover their SCOBY, I’ve found that fruit flies can still find their way in. Once this happens, your entire batch is contaminated.
Now, I use panty-hose. No joke. It works! If not panty hose, I’d recommend a cover specifically suited for this purpose. You can also set up a fruit fly trap by pouring apple cider vinegar in a bowl, covering it with saran wrap and a rubber band, then poking holes. The flies will crawl in and become trapped!
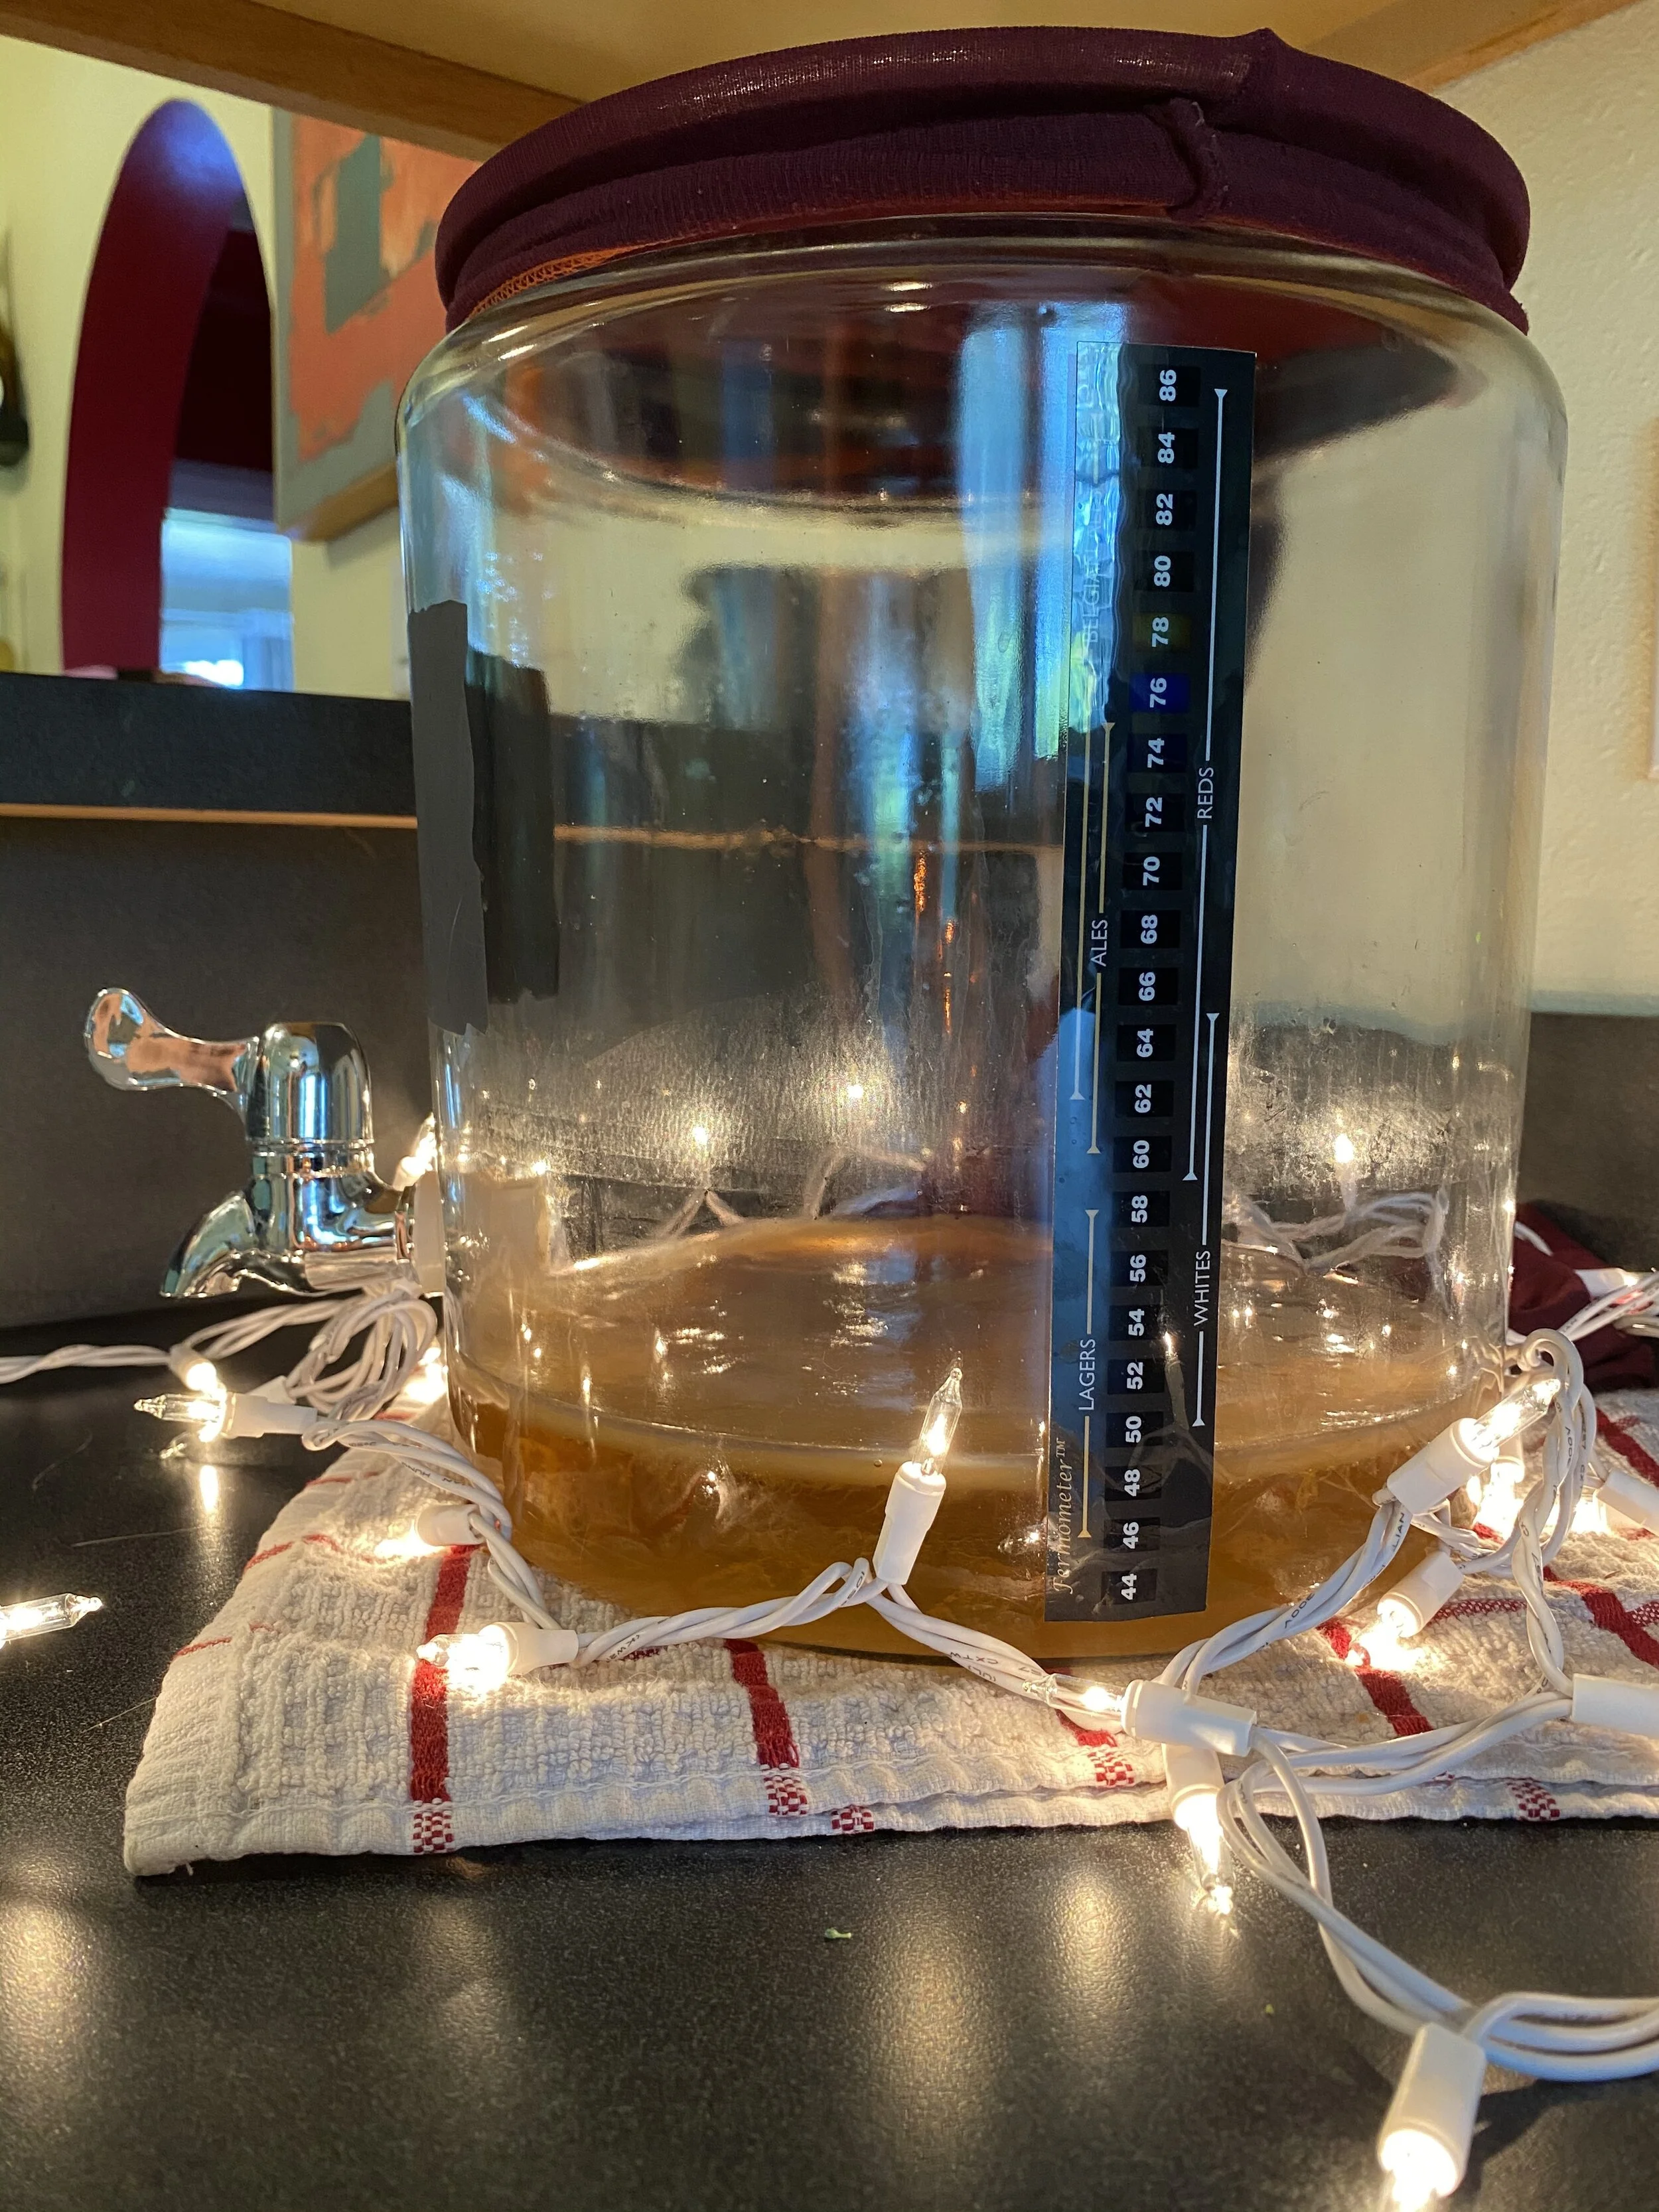
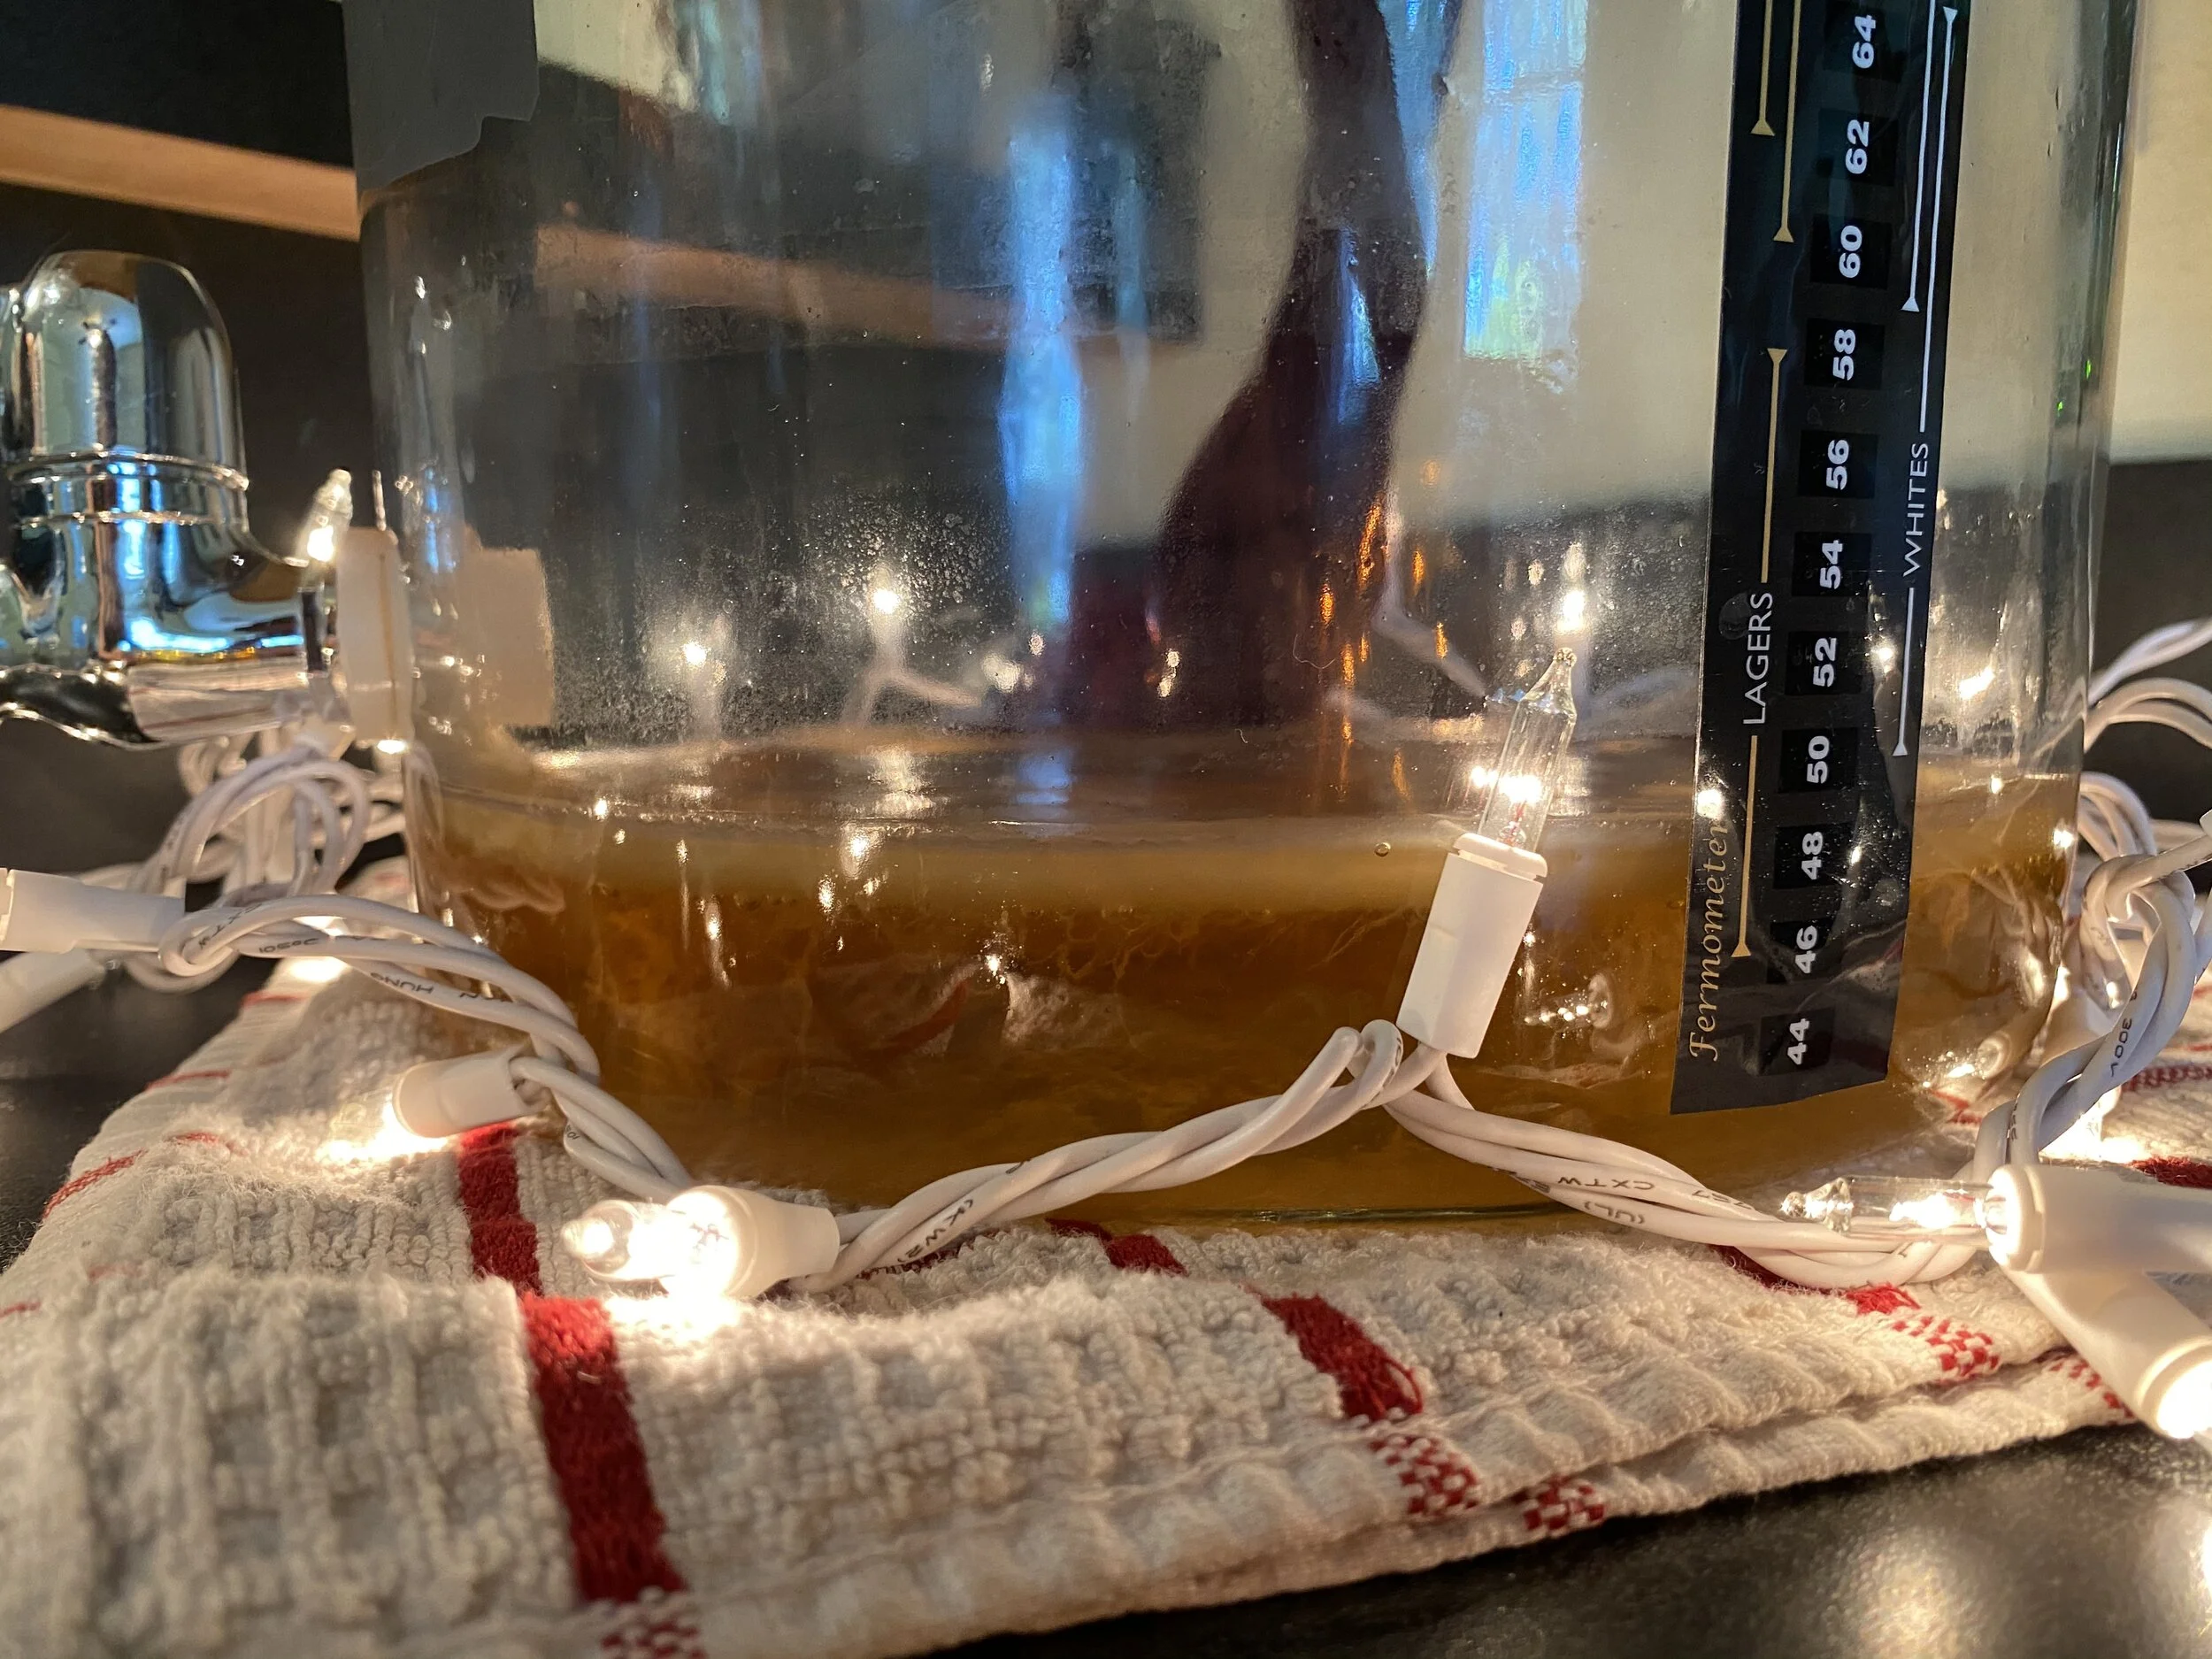
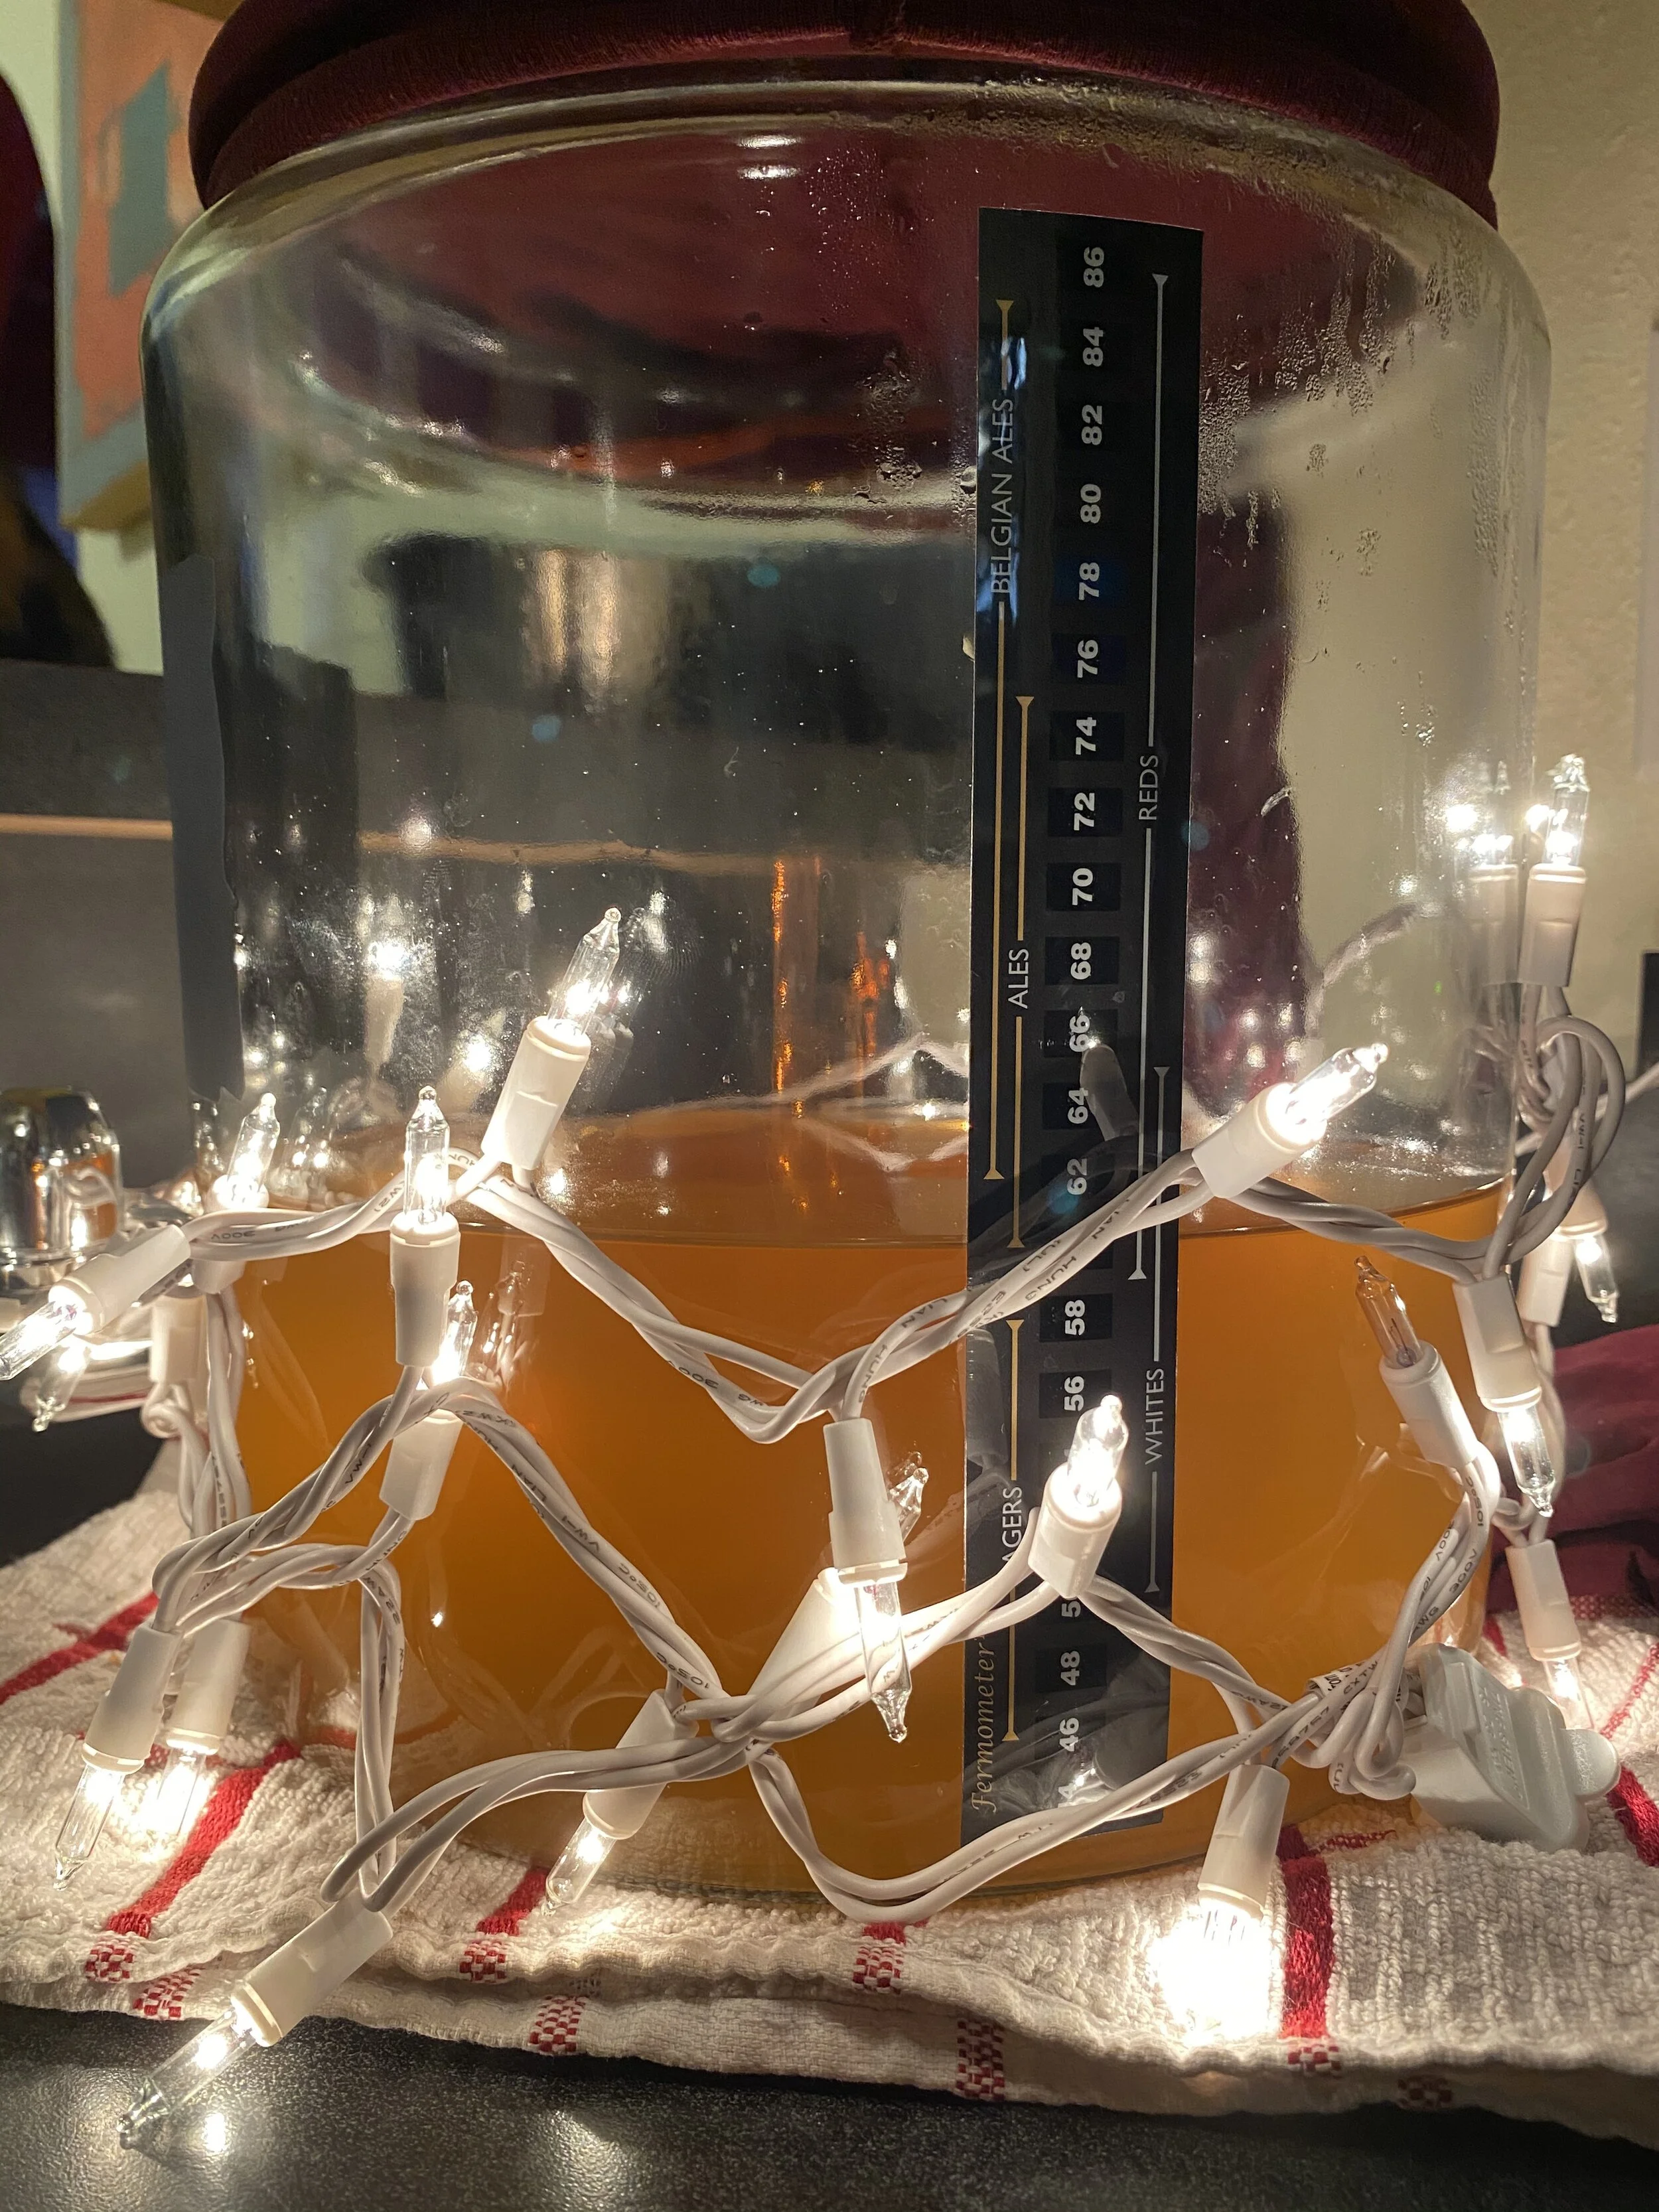
Placement is important! I once placed Kombucha in my laundry room. It seemed logical enough to store it in a room that was generally warmer and darker than the rest of the house. But very quickly, my Kombucha began to mold. I suspect that dust and the inconsistent temperature may have contributed to this. Other causes of mold may be: old tea, flavored tea, not enough liquid, or insufficient sugar. (get this handy adhesive thermometer to keep track of your temperatures) There is no saving your SCOBY from mold. Start over!
Burping: if you bottle your kombucha when it’s still pretty sweet, you might need to burp it to prevent excess pressure from building up. On the other hand, if you kombucha was on the drier side at the time of bottling, you may not need to burp it––and in fact, burping it might let off more carbonation than you’d like. If you choose to burp, I suggest watching Youtube videos for a bit more guidance your first time!
Glass vs. Plastic: I generally recommend using glass (like these), as it is less porous than plastic. Porous plastic can harbor bacteria that can contaminate your kombucha.
For each gallon of sweet tea, use 1 large SCOBY (this is somewhat debatable, but the general consensus seems to be around 3-6 inches in diameter and 1/4 - 1 inch thick)
Ready to start?
Here’s what you’ll need:
Filtered water (chlorinated water is thought to damage/hinder the SCOBY)
Sugar (preferably organic cane sugar)
Tea (black, green, or both)
Starter liquid (for first-timers, this can be the liquid that the SCOBY came in, or from a store-bought raw kombucha)
1 gallon vessel (we like this one!)
Vessel cover (*see Tips & Troubleshooting below for more)
Large rubber bands (to hold the cloth over the mouths of the jars)
Bottles (good quality, specifically meant for carbonation - like these)
Cheesecloth, chinois or other fine mesh strainer (for straining finished kombucha)
Christmas lights - to maintain a warmer temperature!
Ingredients (1 Gallon Batch):
12 cups of filtered water
2 cups starter tea
1 cup organic cane sugar
2 tbsp of loose leaf tea (white, black, or green)
1 large SCOBY
Directions:
In a pot, bring about half of the water to a boil.
Once water is boiling, remove from heat and add sugar. Stir with a sterile utensil until sugar is completely dissolved.
Steep tea for approx. 10 minutes. Allow the sweetened tea to come to room temperature
Move SCOBY out of vessel, then strain the tea into your vessel. Stir, then place SCOBY shiny side up.
With your rubber band, securely cover the vessel. Place the kombucha in a dark, warm environment (around 82 degrees Fahrenheit is ideal). It doesn’t need to be pitch black, but avoid direct sunlight. (tip: use an adhesive thermometer to monitor your temps)
Allow kombucha to ferment for 7-30 days, depending on your personal taste preferences.
Once your first fermentation is complete:
Now, you can experiment with adding in flavors and begin the carbonation process! It is important to use HIGH QUALITY bottles, like these Grolsch-style bottles meant for carbonated beverages, in order to avoid booch bombs.
After adding your flavors, secure the lid and allow it to sit for 2-10 days. As a beginner, I’d encourage “burping” your bottles every few days in order to prevent pressure buildup. As mentioned above, this means you will ever so slightly remove the lid to let a little pressure out.
Watch the video below for more details:
Once you’ve reached the desired taste and carbonation, your kombucha is ready to drink! Move it to the fridge to stop the second fermentation. Home-brewed Kombucha is good for one week after opening.
Have more questions? Contact us here!