Seed Starting Kit

Why grow from seed?

Two major reasons:

  1. You can avoid bringing disease or pests into your garden from even the best, top notch garden centers. Edible plants are just more susceptible to pests and disease than many ornamental. For even the best growers growing in large quantities, it’s difficult to control pest and disease organically on such a large scale.

  2. You can have MUCH more variety as it relates to different types of veggies, herbs, fruit and flowers. I’m personally a fan of dark purple colored varieties of vegetables that have higher anthocyanins, the antioxidant responsible for the purple color that has been shown to combat disease and chronic illness!

Will I be starting seeds indoors or outdoors?

Both! Depending on your climate and frost dates, you may want to consider starting seeds indoors to take advantage of your growing season. For example, here in New Orleans (Zone 9b), I start tomatoes indoors mid-December to be transplanted after the average Frost Date (mid February). These babies wouldn’t survive the colder temperatures outside, but indoors, I can control their climate to germinate and grow.

Some vegetables like Squash, Pumpkin and Melons appreciate being grown indoors out of the risk of being attacked by the dreaded Squash Vine Borer, a moth that lays single eggs along the stem that hatch into grubs that eat inside of the stem, slowly killing your plant.

Shopping List

Disclaimer: Please note that some of the links below are affiliate links. If you click on an affiliate link and make a purchase, we may receive a small commission. Please let us know if you have any questions about the products listed below!

Indoor vs. Outdoor - You'll want both varying throughout the year.

  1. Indoor Setup

    1. Light

    2. Heat Mat - this is crucial for starting spring veggies indoors when temperatures are below 70 degrees Fahrenheit.

    3. Container - to hold the cell packs

    4. Cell Packs

    5. Seed Starting Soil - it is very important to pre-soack this soil before plugging into cell packs and sowing seeds.

    6. Seaweed - you will begin fertilizing your seeds 4-5 weeks after germination.

    7. Mycorrhizae - for when we transplant your seedlings. This will encourage healthier plants by allowing more water and nutrient uptake through the roots!

    8. Mister - save your hand from using a regular spray bottle 

    9. Fan - if you don't already have one. A fan will help increase air flow, making it difficult for bugs to fly in or disease to spread.

    10. Seed Library

      1. It's a good idea to stock up on seeds. Everyone in the gardening community often comments on the unavailability of seeds since lockdown. Most seeds last for 2 years. Lettuces last for 1 year.

      2. This case makes organizing the different types of veggies by family easy and you can put the dates for planting on the cases so when you have space to plant, just see what can be grown at that time :)

      3. I use a Label Maker which actually comes really in handy when some seeds sprout and I have to move them around. And honestly, now I label everything. Based on what you order, I can help you categorize these seeds and give you date ranges for planting!

    11. And last but far from least... Seed Shopping!

      1. Where you get seed from matters. The better the quality, the better the germination and overall growth.

      2. Baker's Creek are my favorite! Next would Southern Seed Exposure that I think would work well for you too considering the warm weather. 

Example of my Seed Storage Container. I have one for Veggies and Herbs, another for Flowers. This photo was taken on a wet, rainy day but please note it is VERY important to keep your seeds cool and dry!

Need help growing from seed with step by step instructions?

Check out my Masterclass on Seed Starting!

The Essentials Kit

This is the Complete Kit I send all of my clients when starting an Edible Garden. I promise you will use every product listed below and every product will together help your chances of growing success! These materials have been curated over the years to know which product works best on what. For example: there’s so many organic pesticides out there, and while many use Neem as an “End All”, it’s only most effective against small bodied insects like mites and aphids as well as a light fungicide.


Order the Essentials:

Green Sand - provides variety of micronutrients and Potassium.

Azomite - Trace minerals for soil nutrition.

Veggie Fertilizer - you will want to mix this in as soon as soil is in.

Super Tea Blend - Beneficial Bacteria, Kelp Meal and Bamboo Silica to add Life to your Soil. Works in conjunction with fertilizers. Use Discount Code INSTAR for 20% off

Bubbler, Stone and Tubing - to activate Super Tea Blend in a 5 gallon bucket. Aerate for 15 minutes.


Mychorrhizae - use during transplanting to increase nutrient and water absorption with beneficial bacterium inoculation

Sprayer - I use these to save money on concentrates but also it takes the guesswork out of mixing chemicals, albeit organic, which if too strong, can burn plants.

Sluggo - Use soil dwelling insects like cutworms, earwigs, snails, slugs and roly poly’s.

BT - Use for caterpillars. They will come along with disease so having these materials on hand is crucial to nipping it in the bud when you find them.

Pyrethrin - Use for stinkbugs and beetles.

Zerotol - Use for fungal infections and preventive spraying, but you can also sterilize just about anything with this! It's hydrogen peroxide based.

Neem Oil - Use on soft bodied insects like mites and aphids. Acts as a gentle fungicide.

Diatomaceous Earth - Use for soil dwelling sects, ants and vine borer prevention. To treat ant piles, disturb the pile carefully with a stick, sprinkler DE. Repeat again and reapply if it gets wet. For vine borer prevention, dust stems of all Cucurbits (squash, pumpkin, melons, etc.) weekly.

Pointy Pruners - Best way to get in there and get detail clipping.

Hydrogen Peroxide, Vinegar, Clean Washcloths - Sterilize your tools or anything else in the house! You should sterilize my tools after every use. At the end of the growing season, I sterilize my trellises as well by spraying down with Zerotol, drying, then wiping off with alcohol wipes.

Hoops - to use for insect netting as prevention and/or frost protection blankets.


Trellises

  1. Cucumber Trellis - Can be used for beans, peas, squashes, cucumbers and more! It also provides shade for growing veggies like lettuce underneath during the hot summer months.

  2. Tomato Cages- Can also be used for Pole Beans and other short, vining veggies.

  3. Pepper/Eggplant Cages - adjustable depending on regular or dwarf varieties.


Bonus Products:

Subpod - feed your plants directly with a secure worm bin that goes straight into your beds! Use Discount Code INSTAR!

Worm Bin - hands down the best, most convenient way to compost and get the benefits of homemade fertilizer and worm castings!

Worm Blanket - Keep the environmental dark, cool and ideal for worms

Coco Coir - Initial bedding for worm bin. You will need this for Worm bin and Subpod.

Live Worms - These should be added to your starting Worm Bin, Subpod or new veggie beds. 2000 should be good for 2 beds. Only order when you’re ready to put into their new home.

Hose - Unless you have one already, I'm a big fan of this Hose! It's so easy to maneuver and is extremely durable! Will outlast any other hose. Use code INSTAR10 for $10 off your purchase!


You will want to make sure these products are out of the elements and locked away so as not to attract rodents! Any sealed container will do. Granular products are not as susceptible to heat as liquids are due to potential of combustion.


Beginner’s Guide: Kombucha

IMG-4783.JPG

It’s time for you to brew your own liquid gold, Kombucha!


First, if you’re new to booch, there are a few basics to know:


What exactly is kombucha?

Simply put, kombucha is a slightly alcoholic, fizzy, fermented sweet tea drink often flavored with things like fruits, juices, herbs, or spices. 


Why should you drink it?

Not only is it so damn good, it’s also a rewarding, creative process. It’s also great for your health. Kombucha’s probiotic properties can promote gut health through the colonization of beneficial microbes within the intestinal tract. Reports include a whole host of health benefits, from improving digestion, diabetes, and immune system function, to reducing blood pressure, alleviating symptoms associated with rheumatism, gout, hemorrhoids, and even fighting cancer. While there hasn’t been any credible scientific studies done on the health benefits of kombucha, the feeling you likely will get from drinking kombucha consistently is a combination of more energy, mental clarity and overall “lightness”. Our gut microbiota is extremely complicated to study, with our digestive tracts playing host to about 100 trillion bacteria. We may never fully understand the interaction between the bacteria from kombucha and the existing bacterial ecosystems in our bodies, but my philosophy here is simple: listen to your body...and to your gut (literally)! There’s a reason people have been praising it’s healing properties for over 2,000 years! 


How is it made?

Find our Recipe below, but generally speaking, you start by boiling water, dissolving sugar, then steeping tea leaves (usually black or green). Once strained and cooled, you’ll begin the first of two phases of fermentation by introducing a SCOBY (symbiotic culture of bacteria and yeast) to the sweetened tea, wherein the yeast and bacteria begin breaking down the sugars into alcohol, and subsequently into compounds like acetic and gluconic acid. The length of this initial aerobic fermentation depends on a few variables, such as temperature or size of your SCOBY, but generally takes about 10-20 days. Phase one is more or less complete once the kombucha satisfies your personal taste preferences (sweetness, acidity, etc.). You can also take a pH test using these pH strips. The perfect pH for second fermentation should you choose to do so, is 3.0. The second stage of fermentation is where flavoring, bottling, and carbonation come into play. Once the kombucha has been flavored to your liking and has been transferred to an air-tight bottle, anaerobic fermentation begins, wherein the residual bacteria and yeast continue digesting sugar molecules, releasing carbon dioxide (CO2) and ethanol as a byproduct. The air-tight bottle traps the resulting CO2, effectively creating the carbonation we associate with kombucha.

Are you a visual learner? Watch this video!

What’s the difference between store-bought and homemade kombucha?

There is something beautifully humbling and wildly empowering about taking ownership of your food supply chain. This same sentiment is one of the many reasons people become so passionate about edible gardening! Making your own kombucha is not only more economically advantageous, but is also more environmentally sustainable through the elimination of single-use packaging. 

Another reason to consider making your own is quality. Due to the legal limitations around ABV and other safety concerns, commercially produced kombucha is sometimes pasteurized, meaning it’s heated to certain temperatures in order to kill harmful bacteria and stop/limit the production of ethanol. The problem with pasteurization is that it isn’t selective about which bacteria it kills, so this effectively reduces or eliminates the rest of those beneficial bacteria/probiotics as well. Of course, not all (or even most) go through this process! Pro tip: only buy kombucha that is specifically labeled as “raw.”

There have been other controversies over accurate labeling of sugar content in commercial products. Making your own kombucha allows you to control the sweetness and flavoring.  


What’s a SCOBY and where can I get one?

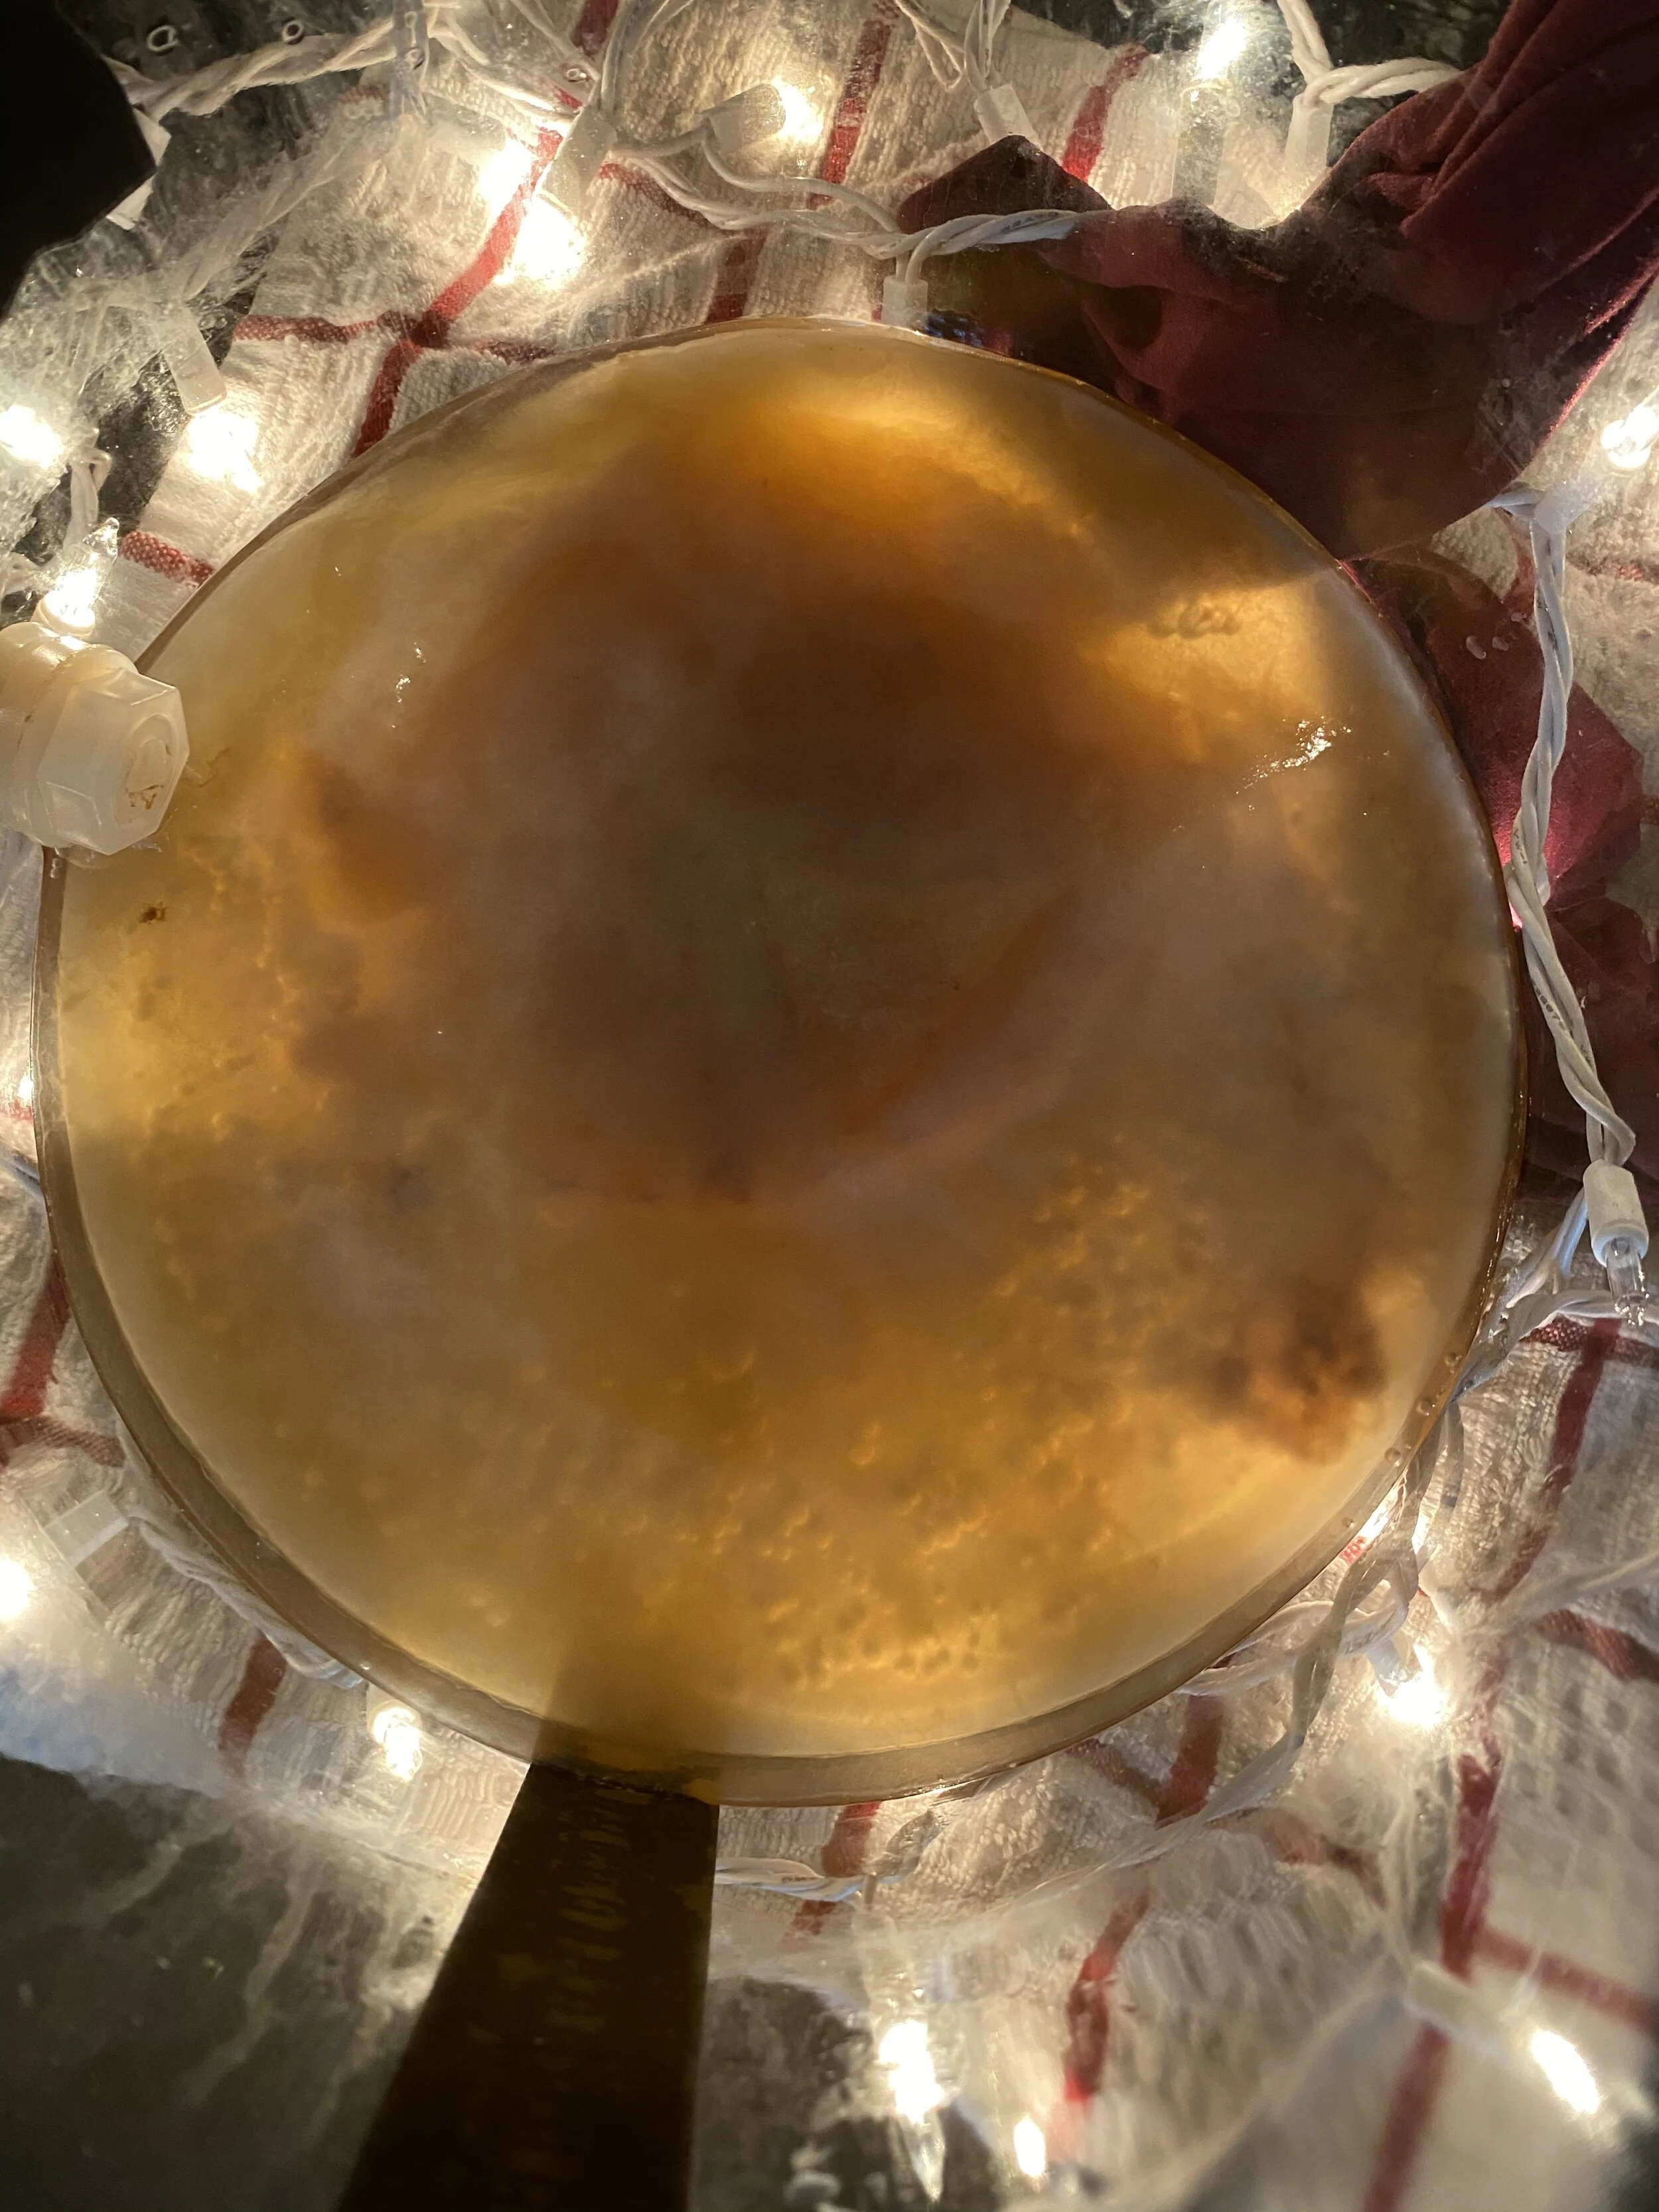
SCOBY is an acronym for “symbiotic culture of bacteria and yeast.” Think of it like a sourdough starter but for kombucha, and much weirder looking. In the context of kombucha, it is a gelatinous cellulose-based biofilm or microbial mat that is added to a tea in order to initiate the fermentation process. While it is possible to grow one yourself, the easier (and arguably safer) route for a novice would be to either acquire one online. Find our favorite source here!

IMG-4781.JPG

Tips & Troubleshooting: read before brewing!!!

Like all living things, a SCOBY can experience issues. Knowing these issues and how to prevent them will save you time, energy, and money. 

  • Covers explained: while many people choose to use cheesecloth to cover their SCOBY, I’ve found that fruit flies can still find their way in. Once this happens, your entire batch is contaminated.

    • Now, I use panty-hose. No joke. It works! If not panty hose, I’d recommend a cover specifically suited for this purpose. You can also set up a fruit fly trap by pouring apple cider vinegar in a bowl, covering it with saran wrap and a rubber band, then poking holes. The flies will crawl in and become trapped!

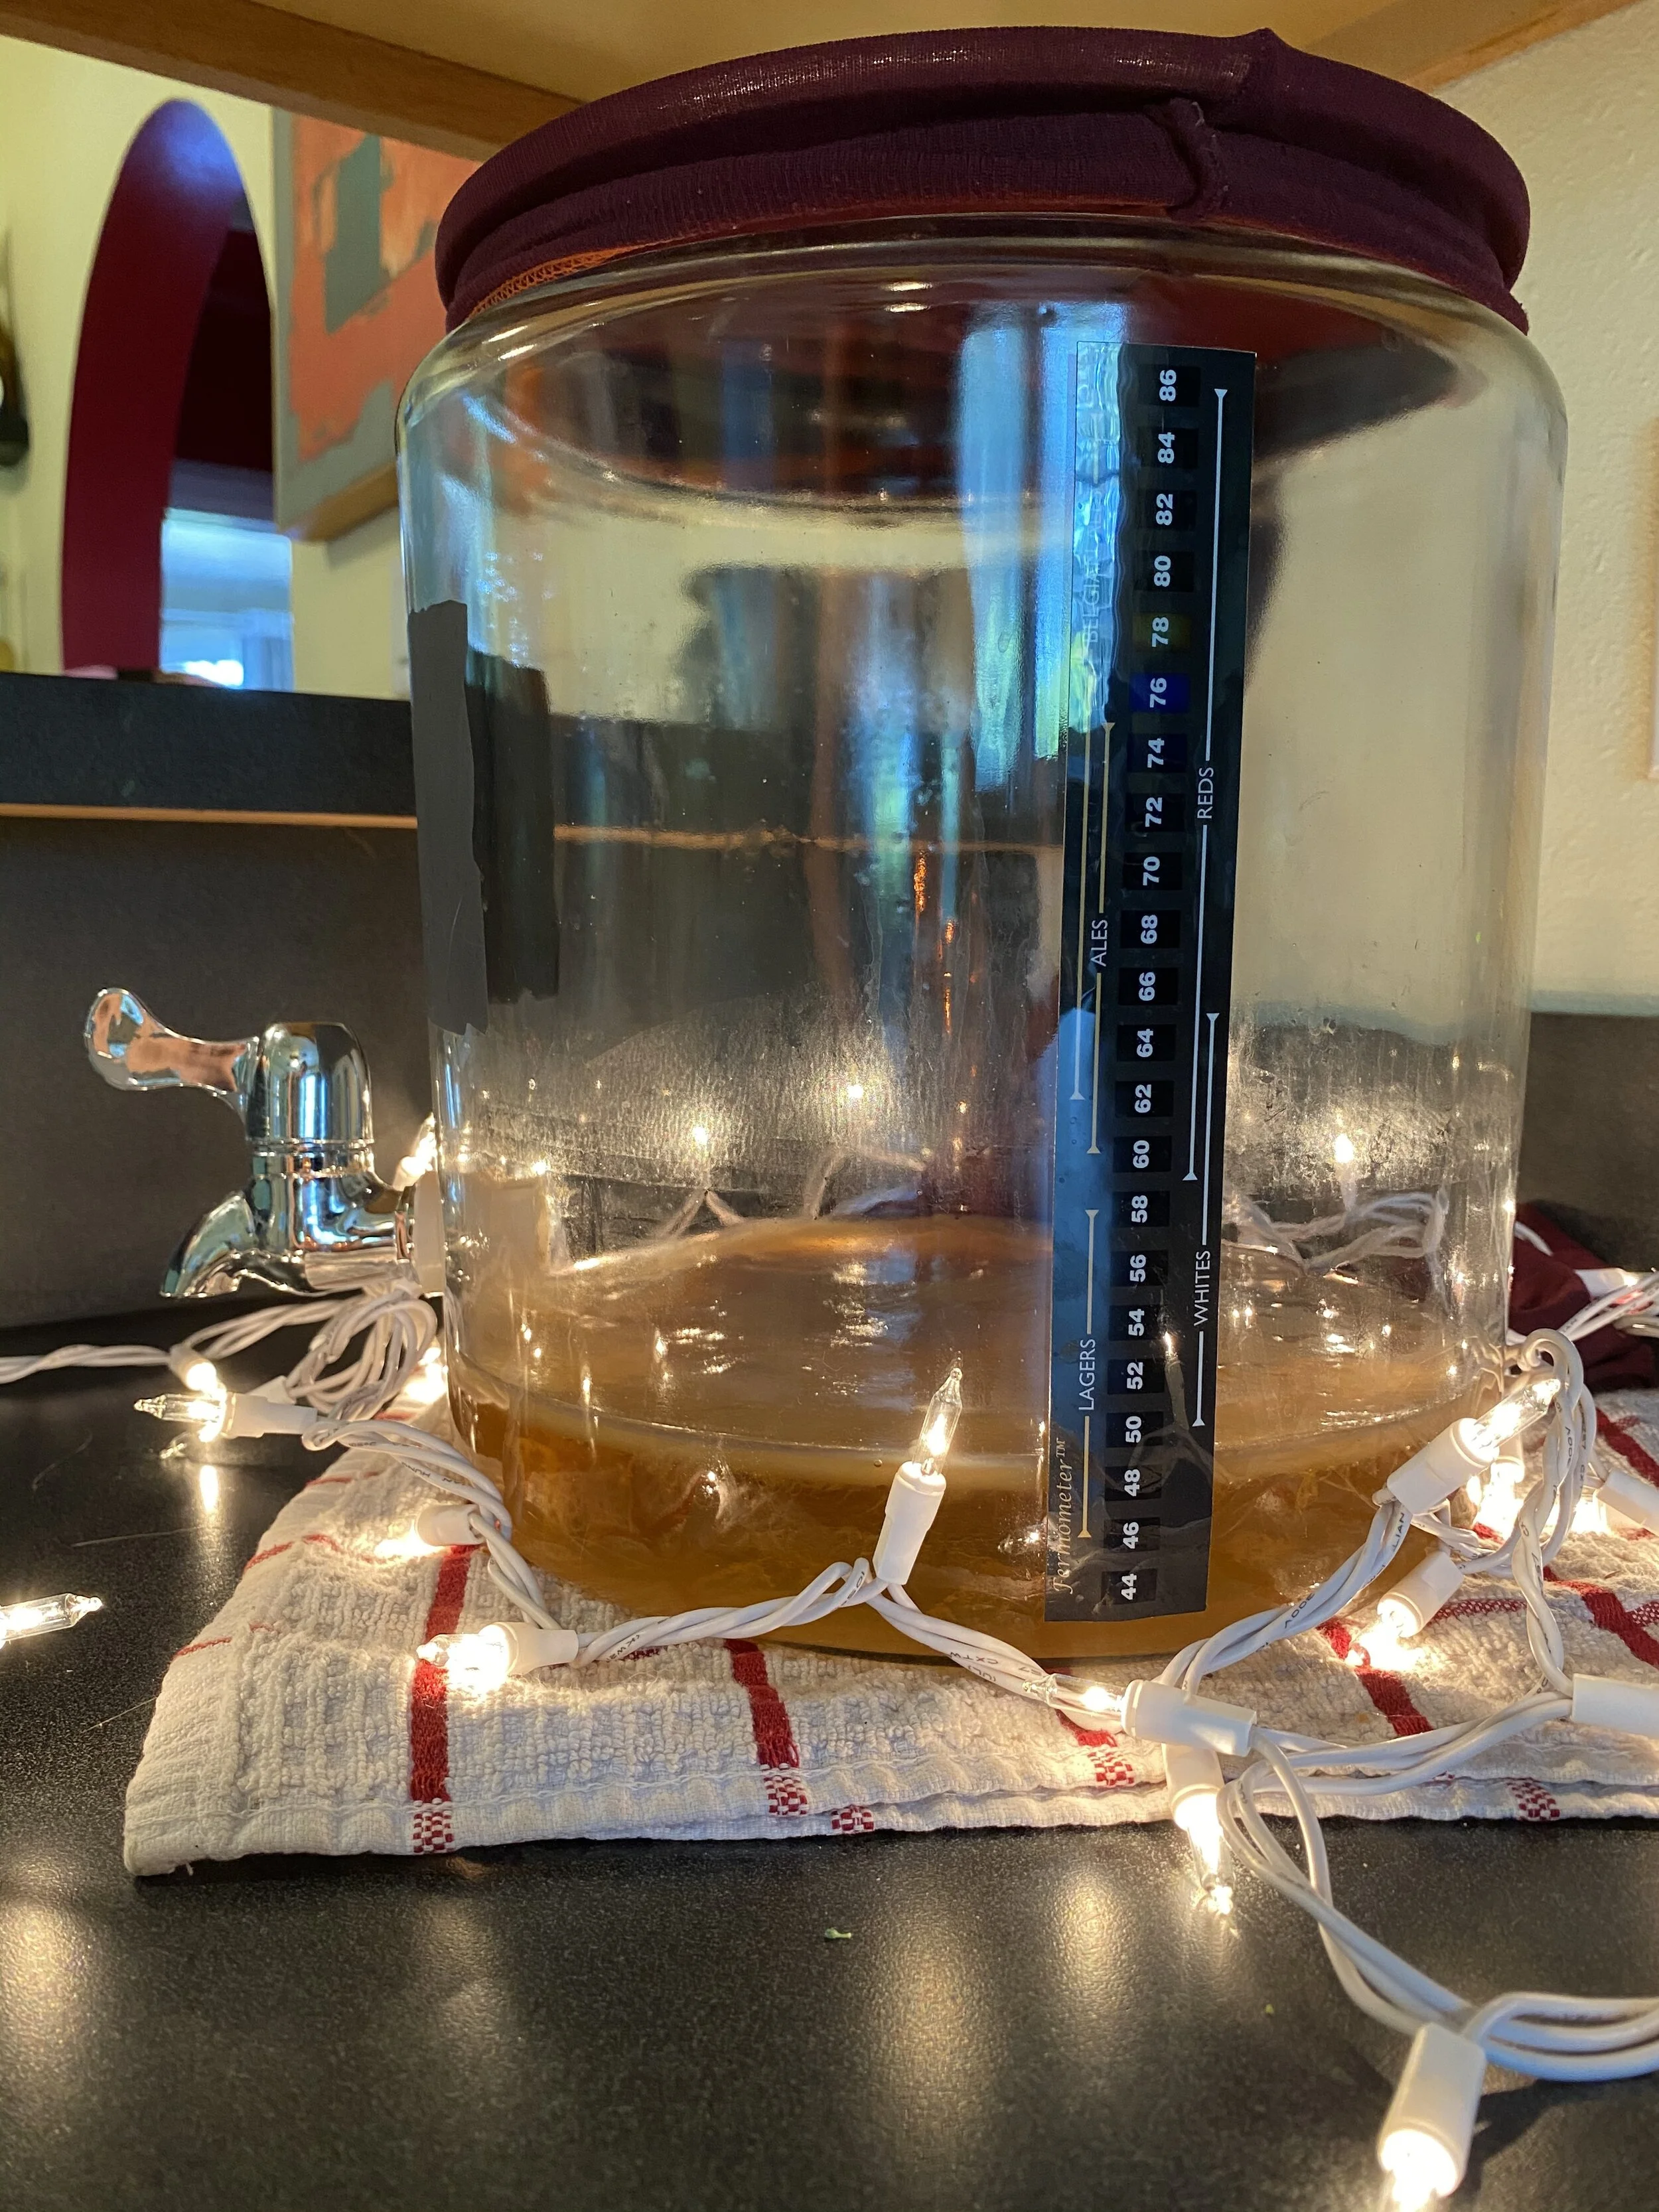
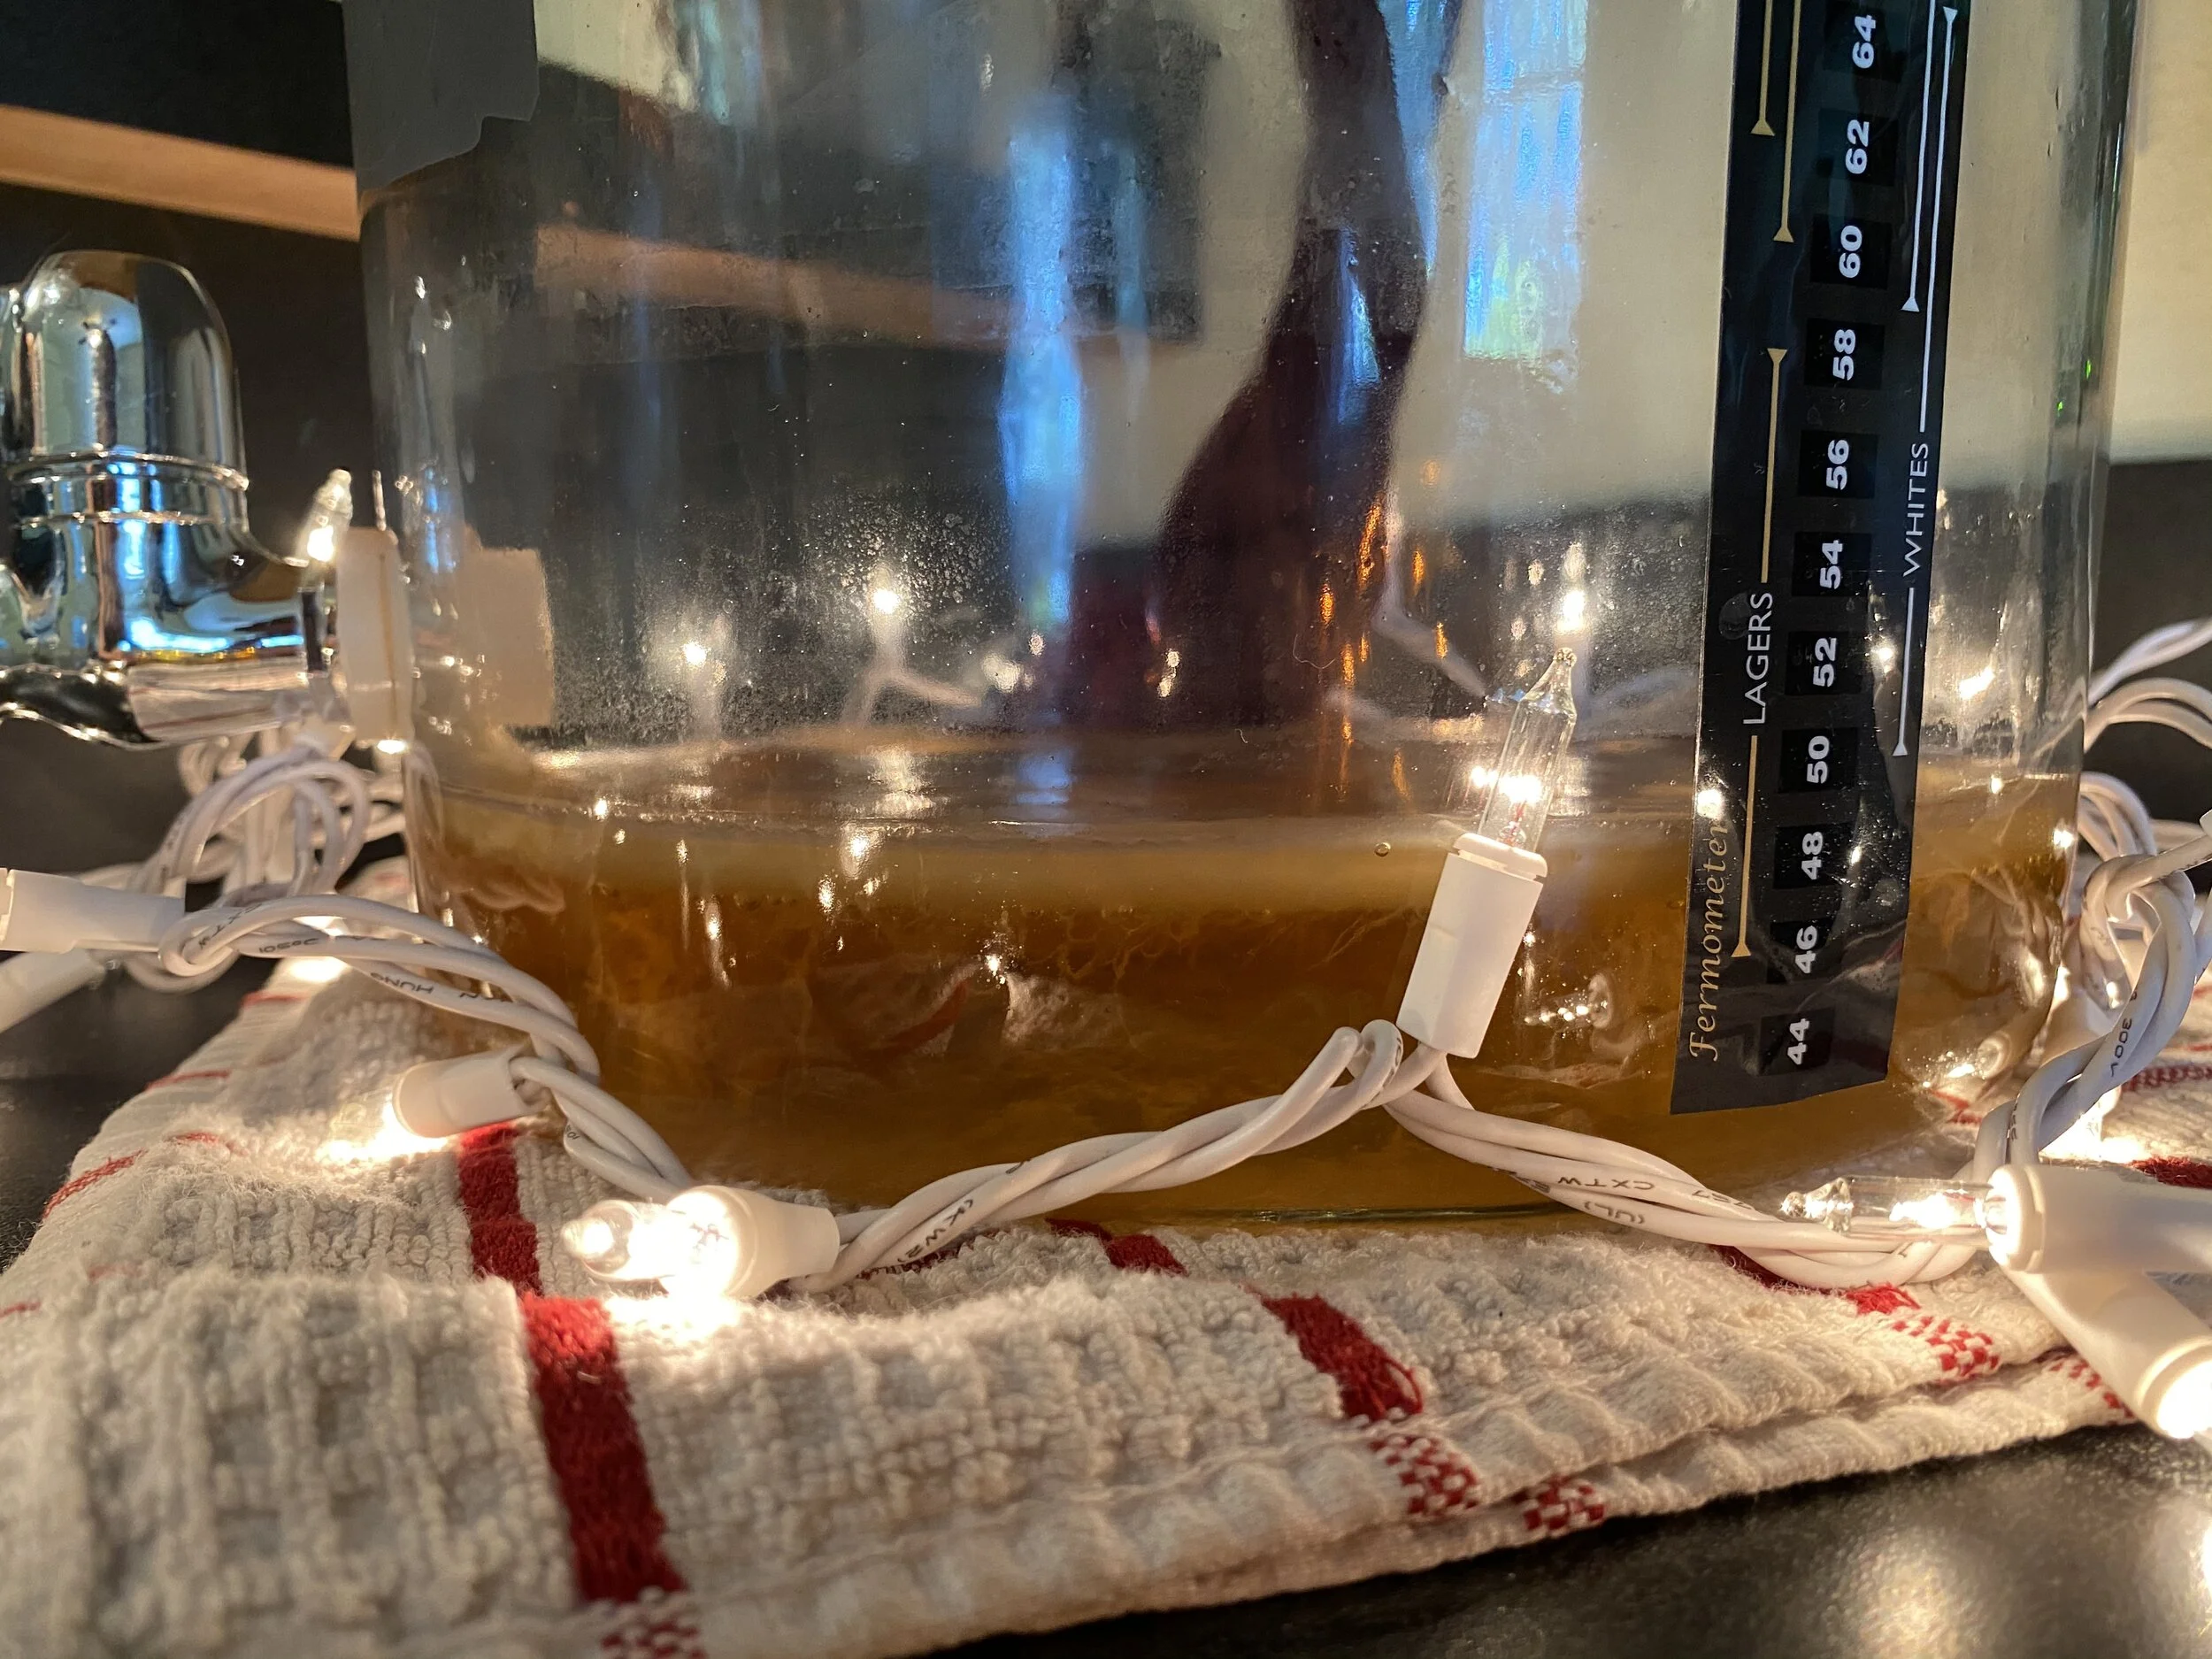
  • Placement is important! I once placed Kombucha in my laundry room. It seemed logical enough to store it in a room that was generally warmer and darker than the rest of the house. But very quickly, my Kombucha began to mold. I suspect that dust and the inconsistent temperature may have contributed to this. Other causes of mold may be: old tea, flavored tea, not enough liquid, or insufficient sugar. (get this handy adhesive thermometer to keep track of your temperatures) There is no saving your SCOBY from mold. Start over!

  • Burping: if you bottle your kombucha when it’s still pretty sweet, you might need to burp it to prevent excess pressure from building up. On the other hand, if you kombucha was on the drier side at the time of bottling, you may not need to burp it––and in fact, burping it might let off more carbonation than you’d like. If you choose to burp, I suggest watching Youtube videos for a bit more guidance your first time!

  • Glass vs. Plastic: I generally recommend using glass (like these), as it is less porous than plastic. Porous plastic can harbor bacteria that can contaminate your kombucha.

  • For each gallon of sweet tea, use 1 large SCOBY (this is somewhat debatable, but the general consensus seems to be around 3-6 inches in diameter and 1/4 - 1 inch thick)

IMG-5041.JPEG
IMG-5039.JPEG
IMG-4782.JPG

Ready to start? 


Here’s what you’ll need:

  1. Filtered water (chlorinated water is thought to damage/hinder the SCOBY)

  2. Sugar (preferably organic cane sugar)

  3. Tea (black, green, or both)

  4. SCOBY

  5. Starter liquid (for first-timers, this can be the liquid that the SCOBY came in, or from a store-bought raw kombucha)

  6. 1 gallon vessel (we like this one!)

  7. Vessel cover (*see Tips & Troubleshooting below for more)

  8. Large rubber bands (to hold the cloth over the mouths of the jars)

  9. Bottles (good quality, specifically meant for carbonation - like these

  10. Cheesecloth, chinois or other fine mesh strainer (for straining finished kombucha)

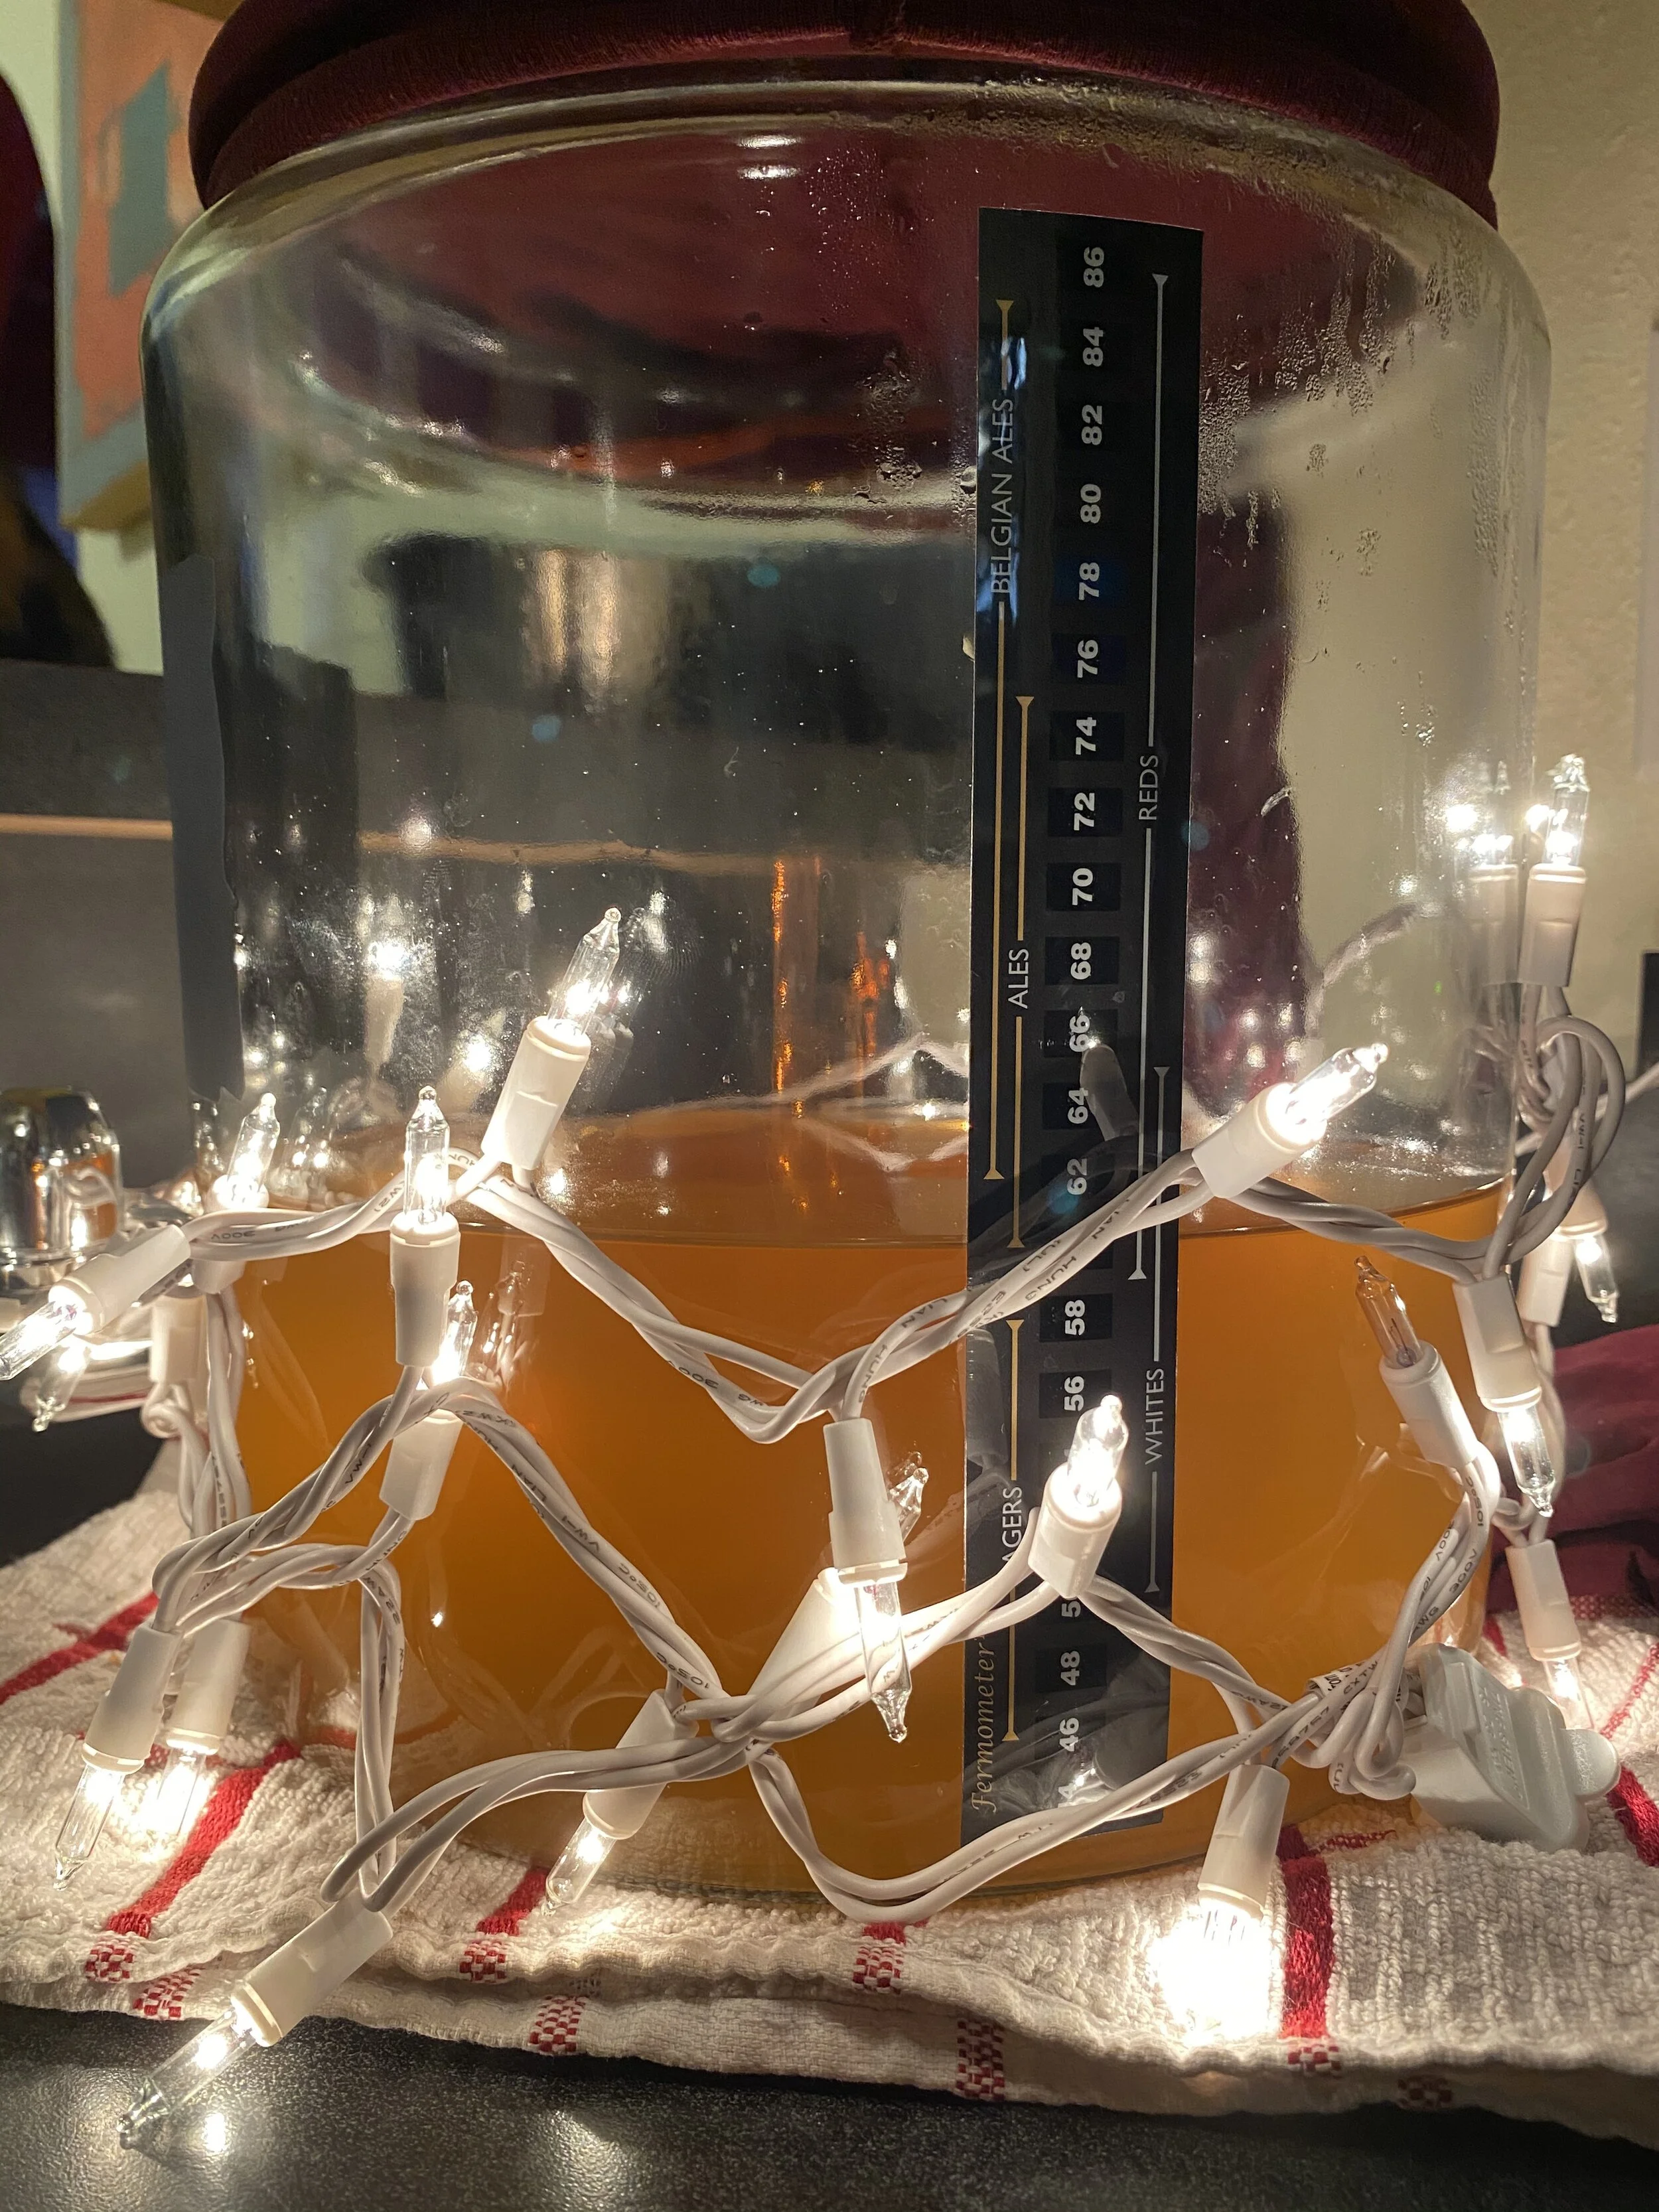
  11. Christmas lights - to maintain a warmer temperature!


Ingredients (1 Gallon Batch):

  1. 12 cups of filtered water 

  2. 2 cups starter tea

  3. 1 cup organic cane sugar

  4. 2 tbsp of loose leaf tea (white, black, or green)

  5. 1 large SCOBY


Directions:

  1. In a pot, bring about half of the water to a boil.

  2. Once water is boiling, remove from heat and add sugar. Stir with a sterile utensil until sugar is completely dissolved.

  3. Steep tea for approx. 10 minutes. Allow the sweetened tea to come to room temperature

  4. Move SCOBY out of vessel, then strain the tea into your vessel. Stir, then place SCOBY shiny side up.

  5. With your rubber band, securely cover the vessel. Place the kombucha in a dark, warm environment (around 82 degrees Fahrenheit is ideal). It doesn’t need to be pitch black, but avoid direct sunlight. (tip: use an adhesive thermometer to monitor your temps)

  6. Allow kombucha to ferment for 7-30 days, depending on your personal taste preferences. 


Once your first fermentation is complete:

  1. Now, you can experiment with adding in flavors and begin the carbonation process! It is important to use HIGH QUALITY bottles, like these Grolsch-style bottles meant for carbonated beverages, in order to avoid booch bombs. 

  2. After adding your flavors, secure the lid and allow it to sit for 2-10 days. As a beginner, I’d encourage “burping” your bottles every few days in order to prevent pressure buildup. As mentioned above, this means you will ever so slightly remove the lid to let a little pressure out. 

  3. Watch the video below for more details:

Once you’ve reached the desired taste and carbonation, your kombucha is ready to drink! Move it to the fridge to stop the second fermentation. Home-brewed Kombucha is good for one week after opening.

IMG-4740.JPEG

Have more questions? Contact us here!

Aerated Worm Tea

By Erin Schott

Watch Erika’s How-to video here .

At Instar, we use aerated worm tea in all of our gardens. From our personal urban farm to client gardens, edible and ornamental plants benefit from a monthly dose of this microbial cornucopia.  So what exactly is "aerated" worm tea? Simply put, it is the end result of steeping worm castings in dechlorinated or distilled water releasing the microbes that live there into an easily absorbed liquid for your plants and soil. Aeration is the process by which you give your microbes oxygen so that they may grow and multiply.  Essentially, you are growing life and creating a living soil when you use aerated worm tea in your garden by releasing valuable bacteria, fungi, actinomycetes, and protozoa to the soil fending off any negative predators in the process.

Living soil is so important in raised beds and native soils alike. In a raised bed, with soil brought in from elsewhere, you want to maintain the health of the soil diversity considering it has little access to the soil life surrounding it in the ground. In a native soil, aerated worm tea will help to create a rich topsoil layer which your plants root into initially and diversify what's below that as you maintain the applications of tea.  Also, by regularly releasing the good guys into your soil you leave little room for anaerobic (thriving without oxygen) bacteria and organisms to invade your plants root systems. You are proactively protecting your plants from compromised health or reduced yields!

Plants need pore spaces around their roots to best thrive which is one of many benefits the microbial life in aerated worm tea help to deliver simply by living their sweet little microscopic lives! As they work, they leave behind valuable nutrients while also creating those necessary pore spaces for plants to access water and oxygen. Lastly, the tea works well as an organic foliar spray to deter small-bodied insects and disease. In the process, your plants become stronger and more disease resistant providing more prosperous harvests. Using aerated worm tea will help you create soil that is healthy and hardworking just like you - The Instar Gardener. Without further delay, go forth and bring your soil to life so that it may provide for you and your generations to come!

Worm Tea Recipe:

Materials Needed:

1. Worm castings - preferably from your own vermicompost system

2. Cheesecloth and string - for the "tea bag"

3. Organic Molasses - about 3-4 tablespoons

4. 5 gallon bucket - filled with dechlorinated or distilled water (we like this lid, too)

5. Small pump with a Bubbler attached via tubing to oxygenate the mixture

Step 1:

Remove about 1 cup of worm castings from your worm bin and place in cheesecloth creating a "tea bag" for steeping!

  • The castings are the moist, thick, and practically black substances left behind once the worms have consumed and excreted what you feed them and contain the microbial essence!

Step 2:

Fill your 5 gallon bucket with dechlorinated or distilled water and ad your 3-4 tablespoons of molasses making sure to stir it to dissolve the thick molasses at the bottom.

  • The molasses is the food for your microbes. The natural sugars in Molasses will give the microbial life energy to multiply as you aerate the tea.

Step 3:

Hang your closed tea bag from the side of the bucket until the castings are submerged and add the airstem of your pump. Let steep for 24- 48 hrs.

  • The longer you allow the mixture to steep and aerate the more life you will be growing. However, any longer than 48 hours and you will have to feed your microbes again with molasses.

Secret Step 4:

Put your positive energy into the appreciation of life from your worms hard work!